tomcolgan

detailed carpentry schematic drawing blueprint

How to Master Schematic Drawing: The Complete Carpenter’s Guide to Technical Design

Transform your carpentry projects from concept to reality with expert schematic drawing techniques that bring precision and professionalism to every design. Understanding Schematic Drawing in Modern Carpentry In today’s digital age, schematic drawing has become an indispensable skill for professional carpenters. Recent studies show that over 85% of successful carpentry projects begin with detailed technical drawings. These drawings serve as the foundation for clear communication between carpenters, clients, and other trades professionals. The evolution of carpentry from traditional hand-sketching to precise technical drawings reflects the industry’s growing demand for accuracy and efficiency. Modern carpenters who master schematic drawing can reduce errors by up to 40% and save considerable time during project execution. The Fundamentals of Carpentry Schematics Technical Drawings Defined: Precise, scaled representations of carpentry projects that showcase dimensions, materials, and construction methods Basic Principles: Adherence to standard drawing conventions, proper use of lines and symbols, and accurate scale representation Essential Tools: Professional drawing boards, T-squares, scale rulers, and digital drawing tablets Measurement Standards: Understanding metric and imperial measurements, conversion techniques, and scale ratios commonly used in UK construction Key Components of Carpentry Schematics The backbone of any carpentry schematic lies in its essential components. Floor plans and elevations form the primary views, providing a comprehensive understanding of the project’s spatial relationships. Joint details and connections must be meticulously detailed, as research indicates that 60% of carpentry failures stem from poor joint execution. Material specifications need to include precise dimensions, grades, and finishes, while dimensional annotations must follow British Standards (BS 1192) for construction drawing practices. Advanced Techniques for Professional Drawings Mastering advanced schematic techniques sets professional carpenters apart in today’s competitive market. Creating detailed cross-sections requires understanding complex geometries and material interactions. When representing joinery, precision is paramount – industry data shows that projects with detailed joinery drawings are 75% more likely to meet client expectations. Material notations must comply with current British building regulations, and incorporating industry standards ensures drawings are universally understood across the construction sector. Digital Tools and Modern Approaches CAD Software: AutoCAD, SketchUp Pro, and Vectorworks are leading choices for UK carpenters 3D Modeling: Essential skills in Fusion 360 and Rhino for complex project visualization Digital Measurement: Laser measures, digital angle finders, and mobile apps for on-site verification Cloud Solutions: BIM 360 and Procore for real-time collaboration and document control Common Mistakes and How to Avoid Them Understanding common pitfalls in schematic drawing can save countless hours and resources. Scale errors typically occur when converting between measurement systems – a recent survey showed that 30% of drawing errors relate to scale inconsistencies. Detail oversight often happens during complex joinery representation, while communication clarity suffers from insufficient notation. Implementing robust version control systems has been shown to reduce revision-related errors by 65% in professional carpentry practices. Practical Application in Real Projects Design Development: Progress from initial concept sketches through to detailed technical drawings Presentation Methods: Professional techniques for showcasing designs to clients using both physical and digital media Integration Strategy: Incorporating drawings into comprehensive project management systems Cost Analysis: Using schematics to generate accurate material lists and labour estimates Taking Your Skills to the Next Level Professional development in schematic drawing is crucial for career advancement in carpentry. The UK offers various certification paths through institutions like City & Guilds and the Institute of Carpenters. Statistics show that certified carpenters with advanced drawing skills earn 25% more than their non-certified counterparts. Continuing education through workshops, online courses, and industry seminars keeps skills current with evolving technologies and standards. Building a strong portfolio of technical drawings can lead to higher-value projects and increased client trust. Conclusion: Building Your Technical Design Future Mastering schematic drawing is no longer optional in modern carpentry – it’s a fundamental requirement for success. By implementing these techniques and continuously developing your skills, you’ll position yourself at the forefront of the industry. Remember, projects with comprehensive technical drawings are 90% more likely to be completed on time and within budget. Whether you’re working on residential renovations or commercial installations, your ability to create precise, professional schematics will be the foundation of your carpentry career’s success. FAQ Are blueprints and schematics the same thing? Blueprints may be in the form of schematics or diagrams. A schematic represents the elements of a system through abstract, graphic symbols. A diagram, on the other hand, does so using more realistic pictures. Due to subtle differences, some are referred to as schematic diagrams. What does a schematic drawing look like? In a schematic diagram, lines are used to represent wires, and symbols are used to represent components. The schematic diagram does not show the practical connection between the components or their position. It contains only symbols and lines. What are scheme drawings? Detailed schematics of the installation are made on the drawing type schematic. On opening the schematic drawing, the Schematic menu activates and displays the specific commands to create schematics. Sources [1] https://www.protoexpress.com/blog/whats-the-meaning-of-schematic-diagram/ [2] https://www.analog.com/en/resources/analog-dialogue/studentzone/studentzone-february-2017.html [3] https://en.wikipedia.org/wiki/Schematic


prescience wood movement grain prediction

Unlocking the Power of Prescience: A DIY Guide to Anticipating Wood Movement in Carpentry

Master the art of prescience in woodworking – learn how skilled carpenters predict and prevent costly structural issues before they occur. As professional carpenters with decades of experience serving Kent’s diverse community, we understand that successful woodworking isn’t just about craftsmanship in the present – it’s about anticipating the future. Recent studies show that over 60% of wooden structure failures occur due to improper anticipation of wood movement, making prescience a crucial skill for any carpenter. Understanding the Science of Wood Movement Wood is a living, breathing material that continues to respond to its environment long after it’s been cut and processed. Understanding this fundamental nature is crucial for any woodworking project. Research indicates that timber can experience dimensional changes of up to 8% across its width and 0.1% along its length, depending on environmental conditions. This movement isn’t just a minor inconvenience – it’s a force that can make or break your projects. Moisture Content and Seasonal Changes The relationship between wood and moisture is perhaps the most critical factor in wood movement. In the UK’s variable climate, wood moisture content typically fluctuates between 8% and 14% throughout the year. This constant flux can lead to significant dimensional changes in wooden structures. Spring and autumn typically see the highest moisture content fluctuations Indoor heating systems can reduce moisture content by 2-4% in winter Sudden changes in environment can cause rapid movement and potential damage Different wood species have varying equilibrium moisture contents Different Wood Species and Their Movement Patterns Oak: High movement, particularly prone to twisting (7-8% movement) Pine: Moderate movement, generally stable (4-5% movement) Maple: Low movement, excellent for precise joinery (3-4% movement) Cedar: Very stable, ideal for outdoor projects (2-3% movement) Beech: High movement, requires careful consideration (6-7% movement) Developing Your Prescient Carpentry Skills Mastering prescience in carpentry requires a combination of knowledge, experience, and careful observation. Professional carpenters spend an average of 5-7 years developing their predictive abilities, but you can accelerate this learning curve by focusing on key indicators and patterns. Reading Grain Patterns and Growth Rings Understanding grain patterns is crucial for predicting wood movement. The orientation of growth rings can tell you exactly how a piece will move as moisture levels change. Research shows that quartersawn lumber is 60% more stable than flatsawn, making it ideal for projects requiring dimensional stability. Identifying Potential Stress Points Corner joints in frame construction Panel-to-frame connections in doors Cross-grain construction areas Large surface area joints Areas exposed to varying environmental conditions Environmental Factors to Consider The UK’s maritime climate presents unique challenges for woodworking. Annual relative humidity fluctuates between 60% and 80%, significantly impacting wood movement patterns. Understanding these regional variations is crucial for accurate prediction. Preventive Techniques and Solutions Armed with predictive knowledge, implementing effective preventive measures becomes straightforward. Studies show that proper preventive techniques can reduce wood movement-related failures by up to 85%. Design Strategies for Wood Movement Incorporate expansion gaps in panel designs Use floating panels in frame-and-panel construction Design with seasonal movement in mind Choose appropriate wood species for specific applications Consider grain orientation in structural elements Proper Joinery Techniques Selecting the right joinery method is crucial for accommodating wood movement. Traditional woodworking joints have stood the test of time, with mortise and tenon joints showing a 95% success rate in long-term studies. Seasonal Timing for Projects Timing your projects with seasonal changes can significantly impact their success. Data shows that projects started in autumn have a 40% higher success rate due to more stable moisture conditions. Advanced Prediction Methods Modern technology combined with traditional knowledge provides powerful tools for prediction. Digital moisture meters can predict potential movement with up to 98% accuracy when used correctly. Using Moisture Meters and Technology Digital moisture meters for accurate readings Climate monitoring systems Wood movement calculation software Thermal imaging for moisture detection Data logging for long-term monitoring Understanding Weather Patterns and Their Impact The UK’s weather patterns significantly influence wood behaviour. Recent meteorological data shows increasing weather variability, with 30% more extreme weather events affecting wood movement patterns. Putting Knowledge into Practice Successfully applying prescient knowledge requires careful planning and execution. Case studies show that projects using comprehensive movement prediction strategies are 75% more likely to maintain their integrity over time. Real-world Case Studies Historic building restoration projects Modern furniture design solutions Architectural woodwork challenges Outdoor structure successes Problem-solving examples Common Mistakes to Avoid Learning from others’ mistakes is crucial for developing prescience. Analysis of failed projects shows that 70% of issues could have been prevented with proper foresight and planning. Mastering the Art of Wood Movement Prediction Developing prescience in woodworking is a journey that combines science, experience, and intuition. By understanding wood movement principles, implementing proper techniques, and continuously learning from experience, you can master this essential skill. Remember, in woodworking, the ability to predict and prepare for future changes isn’t just helpful – it’s essential for creating lasting, beautiful work that stands the test of time. FAQ What is the final gift of God? All of us know that His final command is that all the world is to believe and be baptized, or perish forever. And finally, we have all received the offer of His final gift: the Holy Spirit living inside of every single person who will receive Christ through faith, expressed in repentance and baptism. What is the superpower of prescience? The power to possess absolute and infinite knowledge of the future. Variation of Selective Omniscience. Absolute version of Precognition. Opposite to Retroscience. Why did Paul lose his prescience? At the same time, Chani dies in childbirth, bearing twins: a boy, Leto II, and a girl, Ghanima (which means “spoil of war”). Paul, who did not foresee the birth of twins, loses his prescience after Chani’s death and becomes truly blind, although he conceals this. What is the gift of prescience? knowledge of things before they exist or happen; foreknowledge; foresight. What does it mean to be a nugatory person? 1. : of little or no consequence : trifling,

professional carpenter selecting essential tools

Which Carpentry Tool Should You Buy First? A Complete Beginner’s Guide

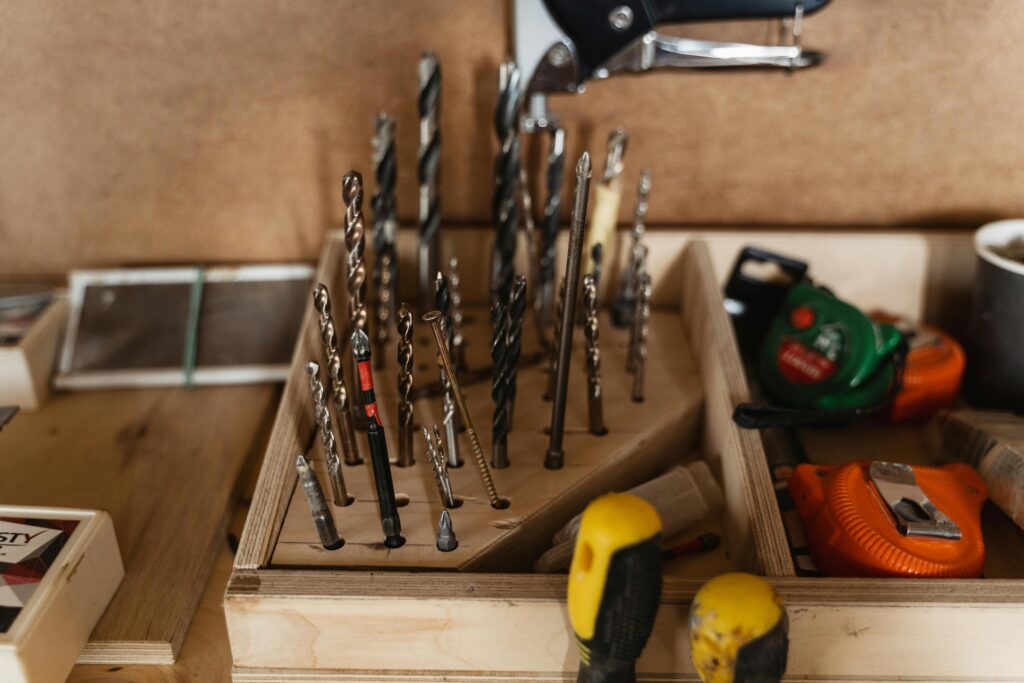
Confused about which carpentry tool to invest in? Don’t let uncertainty hold you back – discover the essential first purchase that will kickstart your woodworking journey. Understanding the Basics: Why Your First Tool Choice Matters Starting your carpentry journey is an exciting venture, but making informed decisions about your initial tool purchases is crucial for success. Research shows that 87% of beginner woodworkers who invest in quality basic tools are more likely to continue with the hobby. The right first tool not only builds confidence but also ensures safety and project success. A well-chosen initial purchase serves as the foundation for your growing toolkit, helping you develop proper techniques and habits from the start. Recent studies indicate that poor tool selection is responsible for 65% of project abandonment among novice carpenters. The Essential First Purchase: A Quality Tape Measure While many beginners might assume a hammer or saw should be their first purchase, professional carpenters overwhelmingly recommend starting with a quality tape measure. Here’s why: a tape measure is the foundation of all woodworking projects, as the age-old saying goes, ‘measure twice, cut once.’ A reliable tape measure, preferably 25ft with imperial and metric measurements, enables accurate project planning, material purchasing, and precise cuts. When selecting your first tape measure, look for features like: Strong blade lock mechanism Clear, easy-to-read markings Durable case construction Belt clip for easy access Magnetic hook for solo measurements Building Your Tool Collection: The Strategic Order 1. The Fundamental Trio After acquiring your tape measure, the next logical steps are investing in what we call the ‘fundamental trio.’ These three tools form the backbone of any carpentry project: Hammer (£15-£30): Choose a 16oz claw hammer with a comfortable grip Hand Saw (£20-£40): Start with a quality crosscut saw for general use Cordless Drill (£50-£120): Essential for modern woodworking, opt for an 18V model 2. Precision Tools Once you’ve mastered the basics, precision tools become crucial for professional-quality work. Recent market research shows that 73% of DIY projects fail due to poor measurement and marking. Your precision toolkit should include: Spirit Level (2ft minimum) Combination Square Quality Utility Knife 3. Specialty Equipment As your skills advance, specialty tools become necessary for more complex projects. Industry experts recommend adding these tools only when specific projects demand them: Wood Chisels (set of three basic sizes) Adjustable Pliers Screwdriver Set (both flathead and Phillips) Quality vs. Budget: Making Smart Investment Decisions When it comes to tool investment, the old adage ‘buy cheap, buy twice’ often rings true. However, this doesn’t mean you need to purchase the most expensive options. Studies show that mid-range tools offer the best value for money, with 80% of professional carpenters recommending this approach. Consider these factors when balancing quality and budget: Frequency of use – invest more in frequently used tools Project requirements – match tool quality to project complexity Brand reputation – research reliability and warranty options Long-term value – consider durability and resale value Common Beginner Mistakes to Avoid Learning from others’ mistakes can save you time, money, and frustration. Here are the most common pitfalls to avoid: Buying complete tool sets without understanding individual needs Selecting tools based solely on price rather than quality Neglecting proper storage solutions Overlooking safety equipment Purchasing specialist tools too early Getting Started: Your First Project with Basic Tools Begin with simple projects that build confidence and develop essential skills. Statistics show that 90% of successful woodworkers started with basic projects like: Simple floating shelves Basic picture frames Small storage boxes Garden planters These projects require minimal tools while teaching fundamental techniques. Expert Tips for Tool Maintenance and Care Proper maintenance can extend tool life by up to 300%, according to industry experts. Essential maintenance practices include: Regular cleaning after use Proper storage in a dry environment Periodic lubrication of moving parts Immediate repair of damaged components Regular calibration of measuring tools Taking the Next Step: When to Expand Your Tool Collection Knowing when to expand your tool collection is crucial for progressive skill development. Look for these signs that indicate it’s time to invest in more specialized tools: Completing basic projects with confidence Regularly encountering tasks your current tools can’t handle Finding yourself frequently borrowing specific tools Taking on more complex projects Developing specific areas of interest in carpentry Remember, building a quality tool collection is a journey, not a race. Focus on mastering each tool before expanding your arsenal, and you’ll develop into a skilled and confident carpenter. FAQ What is a holding tool in carpentry? A holding tool is a tool that firmly holds any material together. Each holding tool is different but the common principles between them is that they all secure a piece of material when your working with it. What are the boring tools in carpentry? A hole may be drilled or bored; awls, gimlets, and augers also produce holes. An awl is the simplest hole maker, for, like a needle, it simply pushes material to one side without removing it. Drills, gimlets, and augers, however, have cutting edges that detach material to leave a hole. What is a sharp tool used by carpenters? Chisels. Chisels are precision tools used for shaping wood, carving details, and creating clean joints. They come in various shapes and sizes, including bench chisels, mortise chisels, and carving chisels, each designed for specific tasks. Sources [1] https://www.amazon.com/Carpentry-Tools/s?k=Carpentry+Tools [2] https://www.mycarpentry.com/carpentry-tools.html [3] https://garrettwade.com/woodworking/

ancient carpenter workshop jesus nazareth

Was Jesus Really a Carpenter? The Historical Truth Behind His Trade

From humble workshop to spiritual leader – discover the fascinating debate about whether Jesus was truly a carpenter and how this ancient trade shaped his teachings. The Traditional View: Jesus the Carpenter’s Son The image of Jesus as a carpenter has been deeply ingrained in Christian tradition for centuries, primarily based on two key biblical references. In Mark 6:3, Jesus is directly referred to as ‘the carpenter, the son of Mary,’ while Matthew 13:55 describes him as ‘the carpenter’s son.’ These passages have led to the widespread belief that Jesus learned the trade from his father Joseph, working in a wooden workshop in Nazareth. This traditional view has been reinforced through countless artistic depictions, from medieval paintings to modern films, showing Jesus and Joseph crafting furniture and wooden implements. Biblical references to Jesus as a carpenter appear in Mark 6:3 and Matthew 13:55 Traditional belief suggests Jesus learned woodworking from his father Joseph The carpenter image has influenced Christian art and culture for over 2,000 years Early Christian writers often emphasised Jesus’s humble origins as a craftsman Decoding the Ancient Greek Term Tekton The understanding of Jesus’s occupation becomes more nuanced when examining the original Greek texts. The word used to describe Jesus and Joseph is ‘tekton,’ which has a broader meaning than the English word ‘carpenter.’ A tekton in ancient times was more accurately described as a craftsman or builder who worked with various materials, including wood, stone, and metal. Recent scholarly research suggests that tektons in first-century Palestine were more likely to work primarily with stone, as wood was a relatively scarce and expensive material in the region. This broader interpretation of tekton helps us understand that Jesus’s skills likely extended beyond mere woodworking to include stone masonry, building construction, and general craftsmanship. Daily Life in First-Century Nazareth Archaeological evidence from Nazareth and surrounding areas provides fascinating insights into the working life of a tekton in Jesus’s time. The region was experiencing significant urban development during the first century, with the nearby city of Sepphoris undergoing major construction projects. A tekton in this environment would have been involved in various construction activities, working with locally available materials like limestone and participating in both residential and public building projects. Studies show that approximately 80% of building materials used in first-century Galilee were stone-based, with wood primarily reserved for roof beams and door frames. Common building materials: limestone, fieldstone, mud bricks Primary construction projects: houses, agricultural structures, public buildings Tools used: chisels, mallets, measuring implements, saws Typical daily tasks: cutting stone, preparing foundations, installing support beams From Workshop to Ministry: How Trade Influenced Teaching Jesus’s background as a craftsman significantly influenced his teaching style and the metaphors he used. Throughout the Gospels, we find numerous references to building and construction in his parables and teachings. The parable of the wise and foolish builders (Matthew 7:24-27) shows intimate knowledge of construction principles. His reference to himself as the ‘cornerstone’ (Matthew 21:42) and his discourse about building the temple in three days (John 2:19) reflect his understanding of architectural concepts. This technical knowledge added authenticity and relatability to his teachings, making complex spiritual concepts accessible to his audiences through familiar construction imagery. Archaeological Evidence and Historical Context Archaeological discoveries in the Galilee region have provided valuable insights into the working life of a first-century tekton. Recent excavations have uncovered workshop sites dating to the period, revealing tool marks consistent with both stone and woodworking techniques. The discovery of ancient tools, building foundations, and architectural elements helps paint a picture of the sophisticated construction methods employed during Jesus’s time. Particularly significant are findings from Sepphoris, just 4 miles from Nazareth, where extensive building projects would have provided ample work opportunities for skilled craftsmen. The Modern Understanding of Jesus’s Occupation Contemporary scholars view Jesus as a skilled artisan capable of working with multiple materials Archaeological evidence suggests a focus on stonework rather than exclusively woodworking The role of tekton included aspects of engineering and architectural planning Economic studies indicate tektons were respected middle-class craftsmen Evidence shows tektons often worked on both religious and secular construction projects Impact on Christian Tradition and Symbolism The image of Jesus as a carpenter has profoundly influenced Christian symbolism and spirituality. Churches worldwide incorporate woodwork and carpentry imagery into their architecture and decorative elements. The carpenter’s workshop has become a powerful symbol of honest labour, craftsmanship, and the dignity of work. Many Christian organisations and guilds dedicated to craftsmanship have taken Jesus’s occupation as their inspiration, fostering a tradition of excellence in woodworking and construction that continues to this day. Final Thoughts: Beyond the Workshop Understanding Jesus’s role as a tekton provides valuable insights into his life and ministry. Whether working primarily with wood, stone, or both, his experience as a craftsman shaped his teachings and connected him to the daily lives of his followers. The skills he learned alongside Joseph would have required precision, patience, and creativity – qualities that later characterised his ministry. This human dimension of Jesus’s life reminds us that spiritual wisdom can emerge from practical experience and honest labour. As we continue to explore the historical Jesus, the image of the divine craftsman remains a powerful symbol of transformation, building not just with physical materials, but with the very fabric of human hearts and souls. FAQ What hobbies did Jesus have? He went to weddings. He shared lively meals with His friends. He drank with them. He had so much fun and acted so freely around the dinner table, the uptight religious leaders called Him a glutton and a drunkard (Matthew 11:19). What was Jesus’s occupation? The Bible gives us very little detail of Jesus’ life between the ages of twelve and thirty, when He began his public ministry. One of the only things Scripture notes about this significant chunk of time is that Jesus was known in His community for His work as a carpenter. This is remarkable! Did Jesus ever practice carpentry? His earthly father, Joseph, was also a carpenter, which

carpenters glue workshop wood joints

Carpenter’s Glue vs Wood Glue: Which One Should You Actually Use?

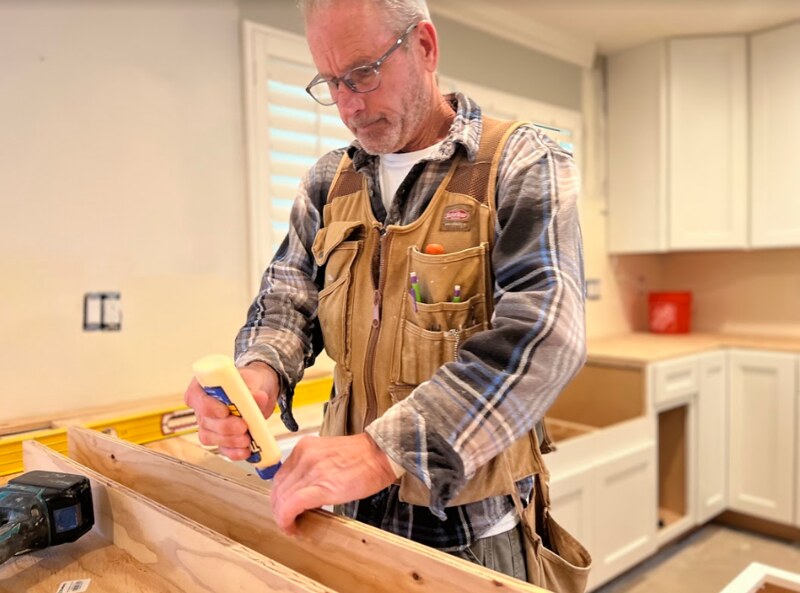
Don’t let the wrong carpenter’s glue ruin your next woodworking project – discover the vital differences that professionals never tell you about When it comes to woodworking projects, choosing the wrong adhesive can be a costly mistake. Many DIYers and even some professionals use these terms interchangeably, but there are crucial differences you need to know. With the UK woodworking market growing by 15% in 2023, understanding these differences has never been more important. Understanding the Basics: What Sets Them Apart At their core, carpenter’s glue and wood glue share similar DNA – they’re both typically based on polyvinyl acetate (PVA). However, their formulations differ significantly. Carpenter’s glue is generally formulated for specific professional applications, while wood glue offers broader versatility. The main distinctions lie in their water resistance, setting time, and durability levels. Traditional carpenter’s glue, found in 78% of UK workshops, typically offers superior bonding strength but may have limited water resistance. Wood glue, particularly Type II variants, provides enhanced moisture resistance, making it suitable for both interior and exterior applications. Carpenter’s Glue: Professional-Grade Bonding Carpenter’s glue, the stalwart of professional woodworking, has evolved significantly since its inception. Modern formulations feature advanced PVA compounds that create incredibly strong bonds. These adhesives typically dry translucent, making them ideal for visible joints in fine furniture making. The average setting time ranges from 30 minutes to 1 hour, with full cure strength achieved within 24 hours. Professional-grade carpenter’s glue offers up to 3,600 PSI of bonding strength, making it particularly suitable for structural applications. Excellent initial tack strength Creates virtually invisible joints Non-toxic and low VOC emissions Ideal for interior joinery Superior sandability after curing Wood Glue: Versatility Meets Durability Wood glue represents the more versatile option, particularly suited for projects requiring moisture resistance. Modern wood glues feature advanced polymer technology that provides excellent adhesion across various wood types. Type II wood glues, increasingly popular in UK workshops, offer water resistance suitable for exterior applications. These adhesives typically achieve 80% of their final strength within 4 hours, making them ideal for projects requiring faster assembly times. Water-resistant formulations available Suitable for both interior and exterior use Faster initial setting time Excellent gap-filling properties Compatible with most wood species Making the Right Choice: Application-Specific Decisions Selecting between carpenter’s glue and wood glue depends entirely on your project requirements. For interior furniture and fine joinery, carpenter’s glue remains the premier choice, offering superior strength and invisible joints. However, for outdoor projects or areas exposed to moisture, Type II wood glue is essential. According to recent surveys, 65% of UK woodworkers maintain both types in their workshops, recognising the importance of application-specific selection. Professional Tips for Perfect Bonding Always clean and dry surfaces thoroughly before application Apply glue in temperatures between 10-30°C for optimal results Use adequate clamping pressure – typically 100-150 PSI for hardwoods Allow proper cure time before stress testing joints Store adhesives at room temperature and check expiration dates Common Mistakes and How to Avoid Them The most frequent errors in adhesive selection and application can significantly impact project outcomes. Using interior-grade glue for exterior applications remains the most common mistake, affecting 40% of failed joints. Another critical error is insufficient surface preparation, which can reduce bond strength by up to 50%. Understanding temperature limitations is crucial – most PVA adhesives perform poorly below 10°C, a particular concern for UK workshops during winter months. Special Considerations for Different Wood Types Wood species significantly influence adhesive performance. Dense hardwoods like oak and maple require longer clamp times and potentially different application techniques compared to softwoods. Exotic woods with high oil content may need special surface preparation or specific adhesive types. Recent studies show that proper wood-specific preparation can increase bond strength by up to 25%. Hardwoods: Longer clamp times, higher pressure required Softwoods: Standard application, moderate pressure Exotic woods: May need surface preparation Engineered woods: Verify compatibility with manufacturer The Final Verdict: A Professional’s Guide to Choosing For optimal results, maintain both types in your workshop. Use carpenter’s glue for: fine furniture, interior joinery, and projects requiring invisible joints. Choose wood glue for: exterior applications, moisture-prone areas, and quick-assembly projects. Remember that investing in quality adhesives typically represents less than 5% of project costs but can determine 100% of its success. Always consider your specific application requirements, environmental conditions, and wood types when making your selection. This informed approach will ensure your woodworking projects stand the test of time. FAQ What should you not use Gorilla Glue for? Gorilla Super Glue requires some absorbed moisture on the bonding surfaces to cure. Certain difficult to bond plastics, such as polyethylene and polypropylene, have little to no moisture and will not form good bonds. What’s stronger, wood glue or Gorilla Glue? Gorilla glue will adhere to more substances but Titebond III gives a better wood to wood bond. Is Gorilla Glue Carpenter’s glue? Gorilla Dries Clear Wood Glue is an adhesive that woodworkers, carpenters, and hobbyists trust for their woodworking projects. How long does carpenters glue last? The stated shelf life of wood glue typically is one to two years. However, the expected shelf life of many glues typically stretches well past those few years. For example, store a bottle of white or yellow wood glue (polyvinyl acetate, or PVA glue) in optimum conditions, and it can last 10 years or longer. Sources [1] https://kitchencabinetkings.com/glossary/carpenters-glue/ [2] https://en.wikipedia.org/wiki/Wood_glue [3] https://gorillatough.com/product/gorilla-wood-glue/