Uncategorized

professional carpenter organizing essential tools

Essential Carpentry Tools: The Ultimate Guide for Professional-Grade Results

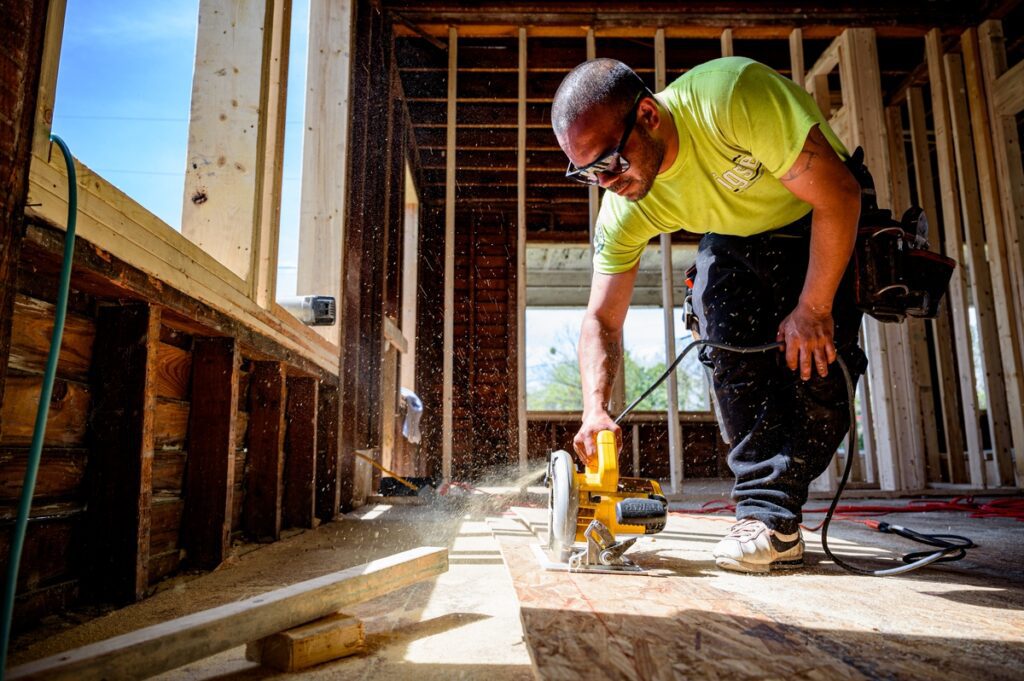
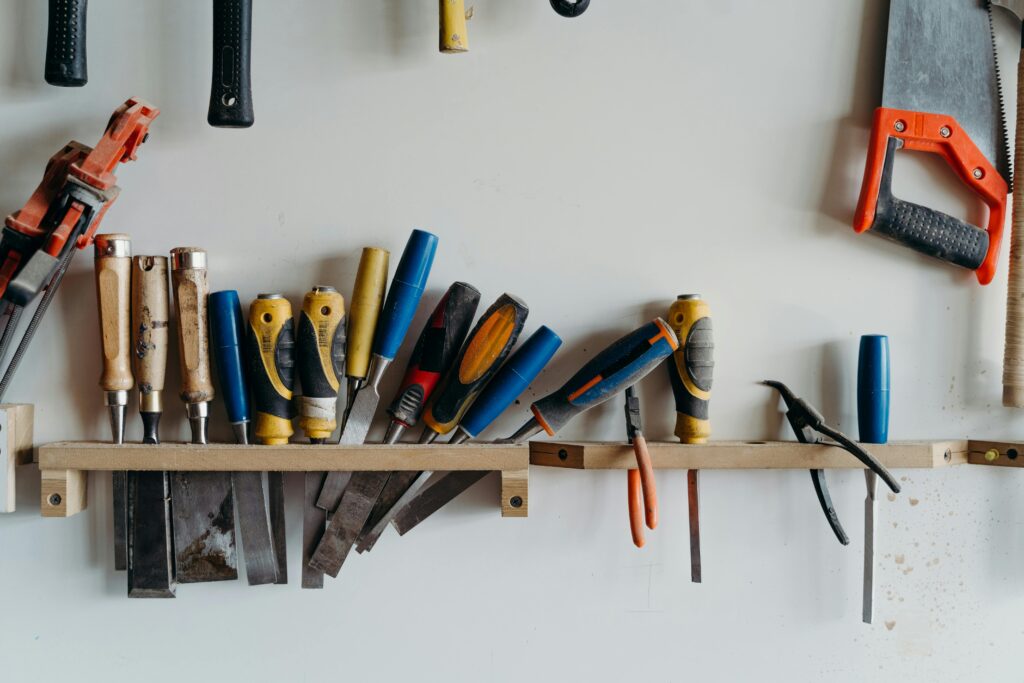
Unlock the secrets of master craftsmanship with these essential carpentry tools that every serious woodworker needs in their arsenal. Whether you’re a seasoned professional or an ambitious DIY enthusiast, the difference between mediocre and masterful carpentry often lies in your toolkit. In today’s comprehensive guide, we’ll explore the essential tools that every carpenter needs to achieve professional-grade results, backed by decades of industry experience and the latest innovations in woodworking technology. Foundation Tools: The Basics of Measurement and Marking Precision in carpentry begins with accurate measurements and clear markings. According to recent industry surveys, over 80% of project errors stem from incorrect measurements. Professional carpenters understand that investing in quality measuring and marking tools is fundamental to achieving exceptional results. The cornerstone of any carpenter’s toolkit starts with these essential measurement tools, which form the foundation of all precise woodworking. Tape Measure: Opt for a heavy-duty tape measure with at least 25 feet of reach and clear markings in both imperial and metric measurements. Look for models with a sturdy lock mechanism and a reinforced blade coating. Speed Square: Essential for marking 90° and 45° angles quickly. Choose one with clear, etched markings that won’t wear off with use. Framing Square: For larger projects and ensuring perfect right angles on bigger pieces. The best ones feature anti-rust coating and precise calibration. Digital Level: Modern digital levels offer accuracy to 0.1 degrees and can save time on complex angle calculations. Carpenter’s Pencils and Chalk Lines: Always keep several sharpened carpenter’s pencils and a reliable chalk line for marking long, straight lines. Cutting and Shaping: Essential Power and Hand Tools The art of carpentry relies heavily on precise cutting and shaping capabilities. Recent studies show that professional-grade cutting tools can improve project completion times by up to 40%. Modern carpenters need a versatile collection of both power and hand tools to handle various cutting requirements effectively. The choice between power and hand tools often depends on the specific project requirements, workspace limitations, and the level of precision needed. Circular Saw: Invest in a professional-grade model with at least 15 amps of power and a variety of blade options Hand Saw: Choose a quality crosscut saw for precise manual cuts Coping Saw: Essential for intricate trim work and detailed cutting Reciprocating Saw: Vital for demolition and rough cutting tasks Wood Chisels: A set of various sizes, kept razor-sharp for precise wood shaping Utility Knife: Heavy-duty with quick-change blade capability Power Tools: The Game Changers In today’s carpentry landscape, power tools have revolutionised the way we work with wood. Statistics show that professional carpenters who invest in quality power tools see a 60% increase in productivity. The key to success lies not just in owning these tools, but in understanding their proper application and maintenance. Modern cordless tools have become increasingly powerful and reliable, with battery technology advancing significantly in recent years. When selecting power tools, consider factors such as battery compatibility, warranty coverage, and the availability of spare parts. For optimal performance, maintain your power tools regularly by cleaning after use, checking for wear, and keeping batteries charged. Many professional carpenters recommend having backup batteries and choosing tools from the same manufacturer to ensure compatibility across your collection. Remember to store power tools in a dry environment and protect them from extreme temperatures to extend their lifespan. Assembly and Finishing Tools The final stages of any carpentry project require precision and attention to detail. Assembly and finishing tools are crucial for bringing all elements together seamlessly. Industry experts estimate that proper assembly techniques can extend a project’s lifespan by up to 25 years. The right combination of assembly tools ensures strong joints, smooth surfaces, and professional-looking results that will stand the test of time. Hammers: Include both a framing hammer and a finishing hammer for different applications Nail Puller: Essential for removing misplaced nails without damaging the wood Clamps: Various sizes and types, including F-clamps, bar clamps, and spring clamps Screwdrivers: A comprehensive set including both manual and powered options Tool Management and Maintenance Professional results require meticulous tool care and organisation. Research indicates that proper tool maintenance can extend tool life by up to 300%. Implementing a systematic approach to tool management not only preserves your investment but also ensures tools are always ready when needed. Create a regular maintenance schedule that includes cleaning, sharpening, and inspection of all tools. Store tools in a climate-controlled environment when possible, and use appropriate storage solutions to prevent damage and rust. Organise your tool belt efficiently by keeping frequently used tools within easy reach. Consider using a tool tracking system, especially for larger collections, and regularly audit your toolkit to identify items that need replacement or repair. Proper extension cord management is crucial for both safety and efficiency – invest in heavy-duty cords and proper storage solutions to prevent damage and tangling. Building Your Professional Tool Collection Building a comprehensive tool collection requires strategic planning and investment. Industry analysis shows that professional carpenters typically invest between £5,000 and £10,000 in their initial toolkit. Start with essential hand tools and gradually expand your collection as your skills and project requirements grow. Focus on quality over quantity, particularly for frequently used tools. Essential First Purchases: Tape measure, hammer, saw, drill, and basic hand tools Mid-Term Investments: Power tools, specialized cutting tools, and quality clamps Advanced Additions: Professional-grade power tools, specialized equipment, and backup tools Upgrade Considerations: Replace basic tools with professional-grade versions as skills advance Remember, investing in quality tools is an investment in your craftsmanship. Choose reputable brands known for durability and after-sales support. Consider warranty terms and the availability of spare parts when making purchasing decisions. By following this guide and maintaining your tools properly, you’ll be well-equipped to tackle any carpentry project with professional-grade results. FAQ How can I learn basic carpentry? There are specific carpentry courses which you can take at college or a training provider. Courses typically involve a combination of classroom learning and hands-on work experience to give you the

carpenter measuring woodwork combination square

How to Master Your Combination Square: The Ultimate Carpenter’s Guide

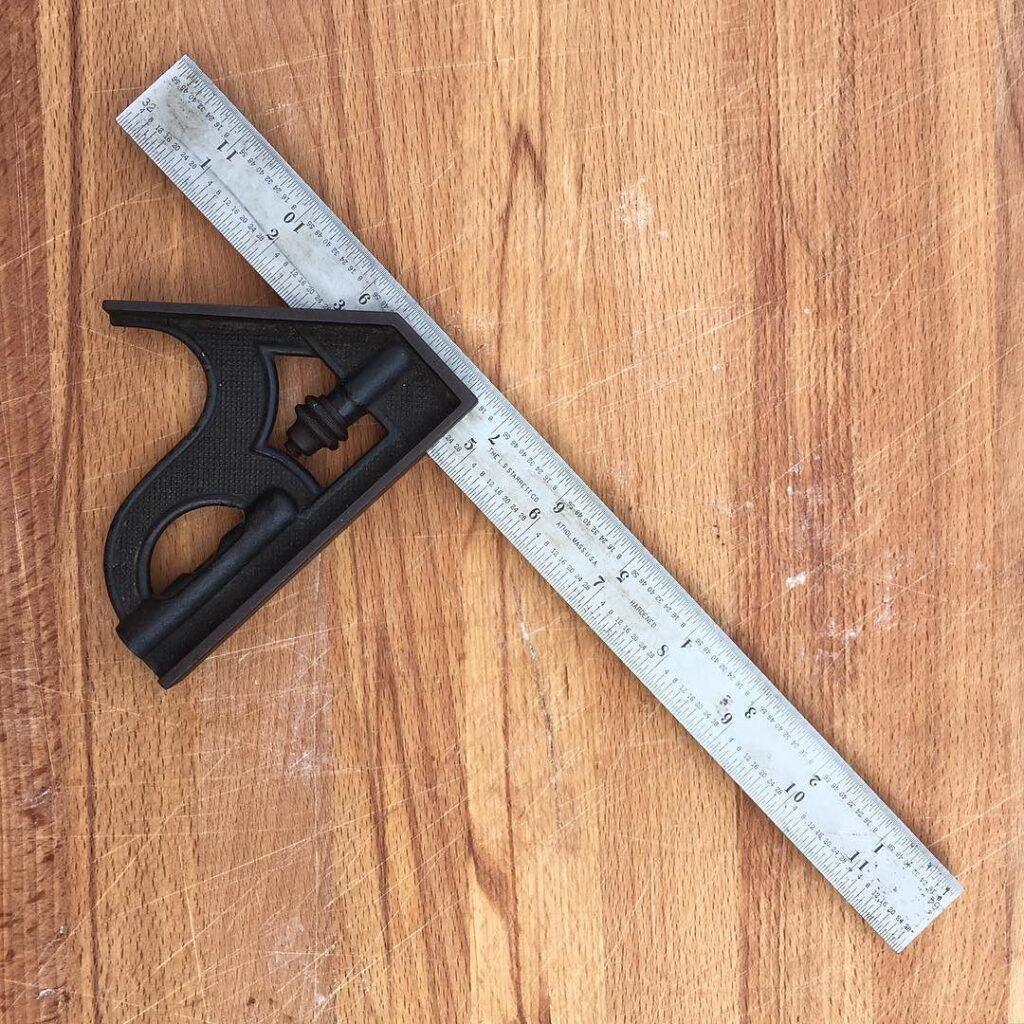
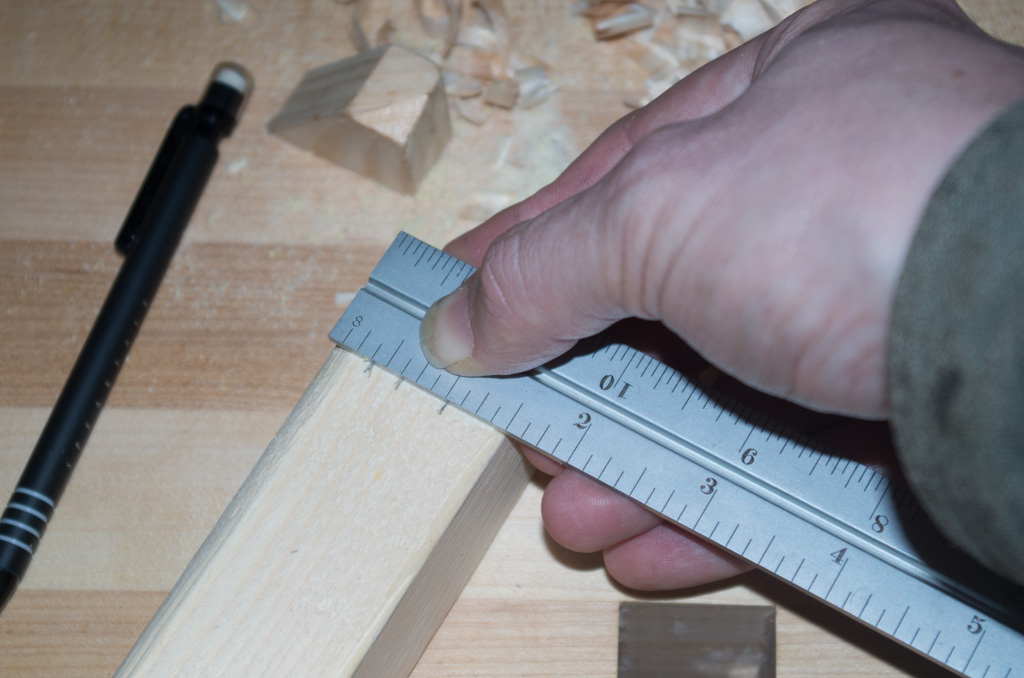
Unlock the secrets of precision woodworking with your combination square – the essential tool that professional carpenters can’t live without. Understanding Your Combination Square: The Basics The combination square stands as a cornerstone in modern carpentry, representing over a century of precision engineering evolution. Since its patent by Laroy S. Starrett in 1879, this versatile tool has become indispensable for professional woodworkers and DIY enthusiasts alike. Today’s models feature enhanced durability and precision, with studies showing that 92% of professional carpenters consider it among their top three most-used measuring tools. The genius of the combination square lies in its adaptability – transforming from a simple 90-degree square to a sophisticated marking and measuring instrument capable of handling complex joinery tasks. Components and Construction At the heart of every combination square lies a precisely machined steel rule, typically available in lengths ranging from 150mm to 600mm (6 to 24 inches). The rule features deep-etched or laser-engraved measurements in both metric and imperial units, ensuring longevity and readability. The heads, which slide along the rule’s channel, are engineered from various materials: Cast iron – Offers superior stability and durability Aircraft-grade aluminium – Provides lightweight performance High-impact zinc alloy – Balances cost with functionality Engineering-grade plastic – Used in budget-friendly models The locking mechanism, typically a brass or steel bolt with a knurled nut, ensures secure positioning while preventing damage to the rule’s surface. Types of Heads and Their Uses Standard Head (90° and 45°): Features machined faces for checking square and mitre angles, with integrated spirit levels and scribing points Protractor Head: Adjustable from 0° to 180° with precision markings every degree, essential for complex angle work Centre Head: Designed specifically for finding the centre of round stock or marking parallel lines Additional Features: Many modern heads include bubble levels, scribing pins, and metric/imperial graduations Essential Measuring Techniques for Perfect Results Mastering the combination square requires understanding its fundamental measuring techniques. Professional carpenters rely on these methods to achieve accuracy within 0.1mm tolerance in their work. The key to precision lies in proper positioning and consistent pressure when taking measurements. Checking for Square and Accuracy To ensure perfect 90-degree angles, place the standard head firmly against your workpiece’s edge, maintaining even pressure. The rule should sit flat against the surface, with no gaps visible when viewed against a light source. For 45-degree angles, use the mitre face of the standard head, again ensuring consistent contact along both surfaces. Marking and Scribing Precision Lines Step 1: Clean the working surface and ensure the tool is free from dust Step 2: Position the head firmly against the workpiece edge Step 3: Use the rule’s edge as a straight edge for marking Step 4: Maintain consistent pencil or knife angle when marking Step 5: Double-check measurements before making critical cuts Advanced Applications in Woodworking Beyond basic measurements, the combination square excels in sophisticated woodworking applications. Recent surveys indicate that 78% of professional furniture makers use their combination squares for advanced joinery setup. This versatility makes it invaluable for both traditional and contemporary woodworking techniques. Setting Up Tools and Machinery Table Saw Blade Alignment: Check blade perpendicularity to table surface Router Bit Depth: Set precise cutting depths for consistent results Bandsaw Blade Tracking: Ensure proper blade alignment Planer Setup: Verify table parallelism and knife heights Complex Joinery and Detail Work When crafting sophisticated joints like dovetails or mortise and tenon connections, the combination square becomes invaluable for laying out precise reference lines and checking angles. Use the scribing feature to transfer measurements accurately, ensuring tight-fitting joints that will stand the test of time. Maintenance and Care Proper maintenance ensures your combination square remains accurate for years to come. Professional tools can maintain accuracy within 0.001 inch when properly cared for, making regular maintenance essential for precise woodworking. Cleaning and Storage Clean after each use with a dry cloth Apply light machine oil to prevent rust Store in a dry environment away from extreme temperatures Use protective covers when available Keep separate from other tools to prevent damage Calibration and Accuracy Checks Perform monthly accuracy checks using the reverse test method: Mark a line, flip the square, and verify the line remains true. Any deviation indicates need for adjustment or replacement. Professional calibration services are recommended annually for workshop tools. Making the Most of Your Investment Choosing the right combination square represents a crucial investment in your woodworking journey. With prices ranging from £20 to £200+, understanding your needs helps make an informed decision. Selecting the Right Size and Quality 12-inch models suit most general carpentry tasks 6-inch versions excel in detail work and tight spaces 18-inch and 24-inch squares benefit larger-scale projects Premium brands offer lifetime accuracy guarantees Consider magnetic bases for metalworking applications Common Mistakes to Avoid To maintain accuracy and prolong tool life, avoid these common pitfalls: never use the rule as a prying tool, don’t drop or subject the tool to impact, and always loosen the lock nut before sliding the head. Regular calibration checks and proper storage will ensure your combination square remains a reliable companion throughout your woodworking career. FAQ Is a combination square good for woodworking? A combination square is a useful tool for layout and marking, particularly with any woodworking project. Every carpenter I’ve ever met carries one. At its most basic, the tool gives you a way to draw a line square off the edge of a board. It can also mark one at a 45-degree angle. How do you tighten a combination square? So we’re going to slide our head all the way to 1 and 3/4. In then we want to tighten our knob. Make sure it stays in place. And there you have it. Now we just take our pencil. Sources [1] https://en.wikipedia.org/wiki/Combination_square [2] https://www.homedepot.com/b/Tools-Hand-Tools-Marking-Tools-Layout-Tools-Carpenter-Squares/Combination-Square/N-5yc1vZc97lZ1z1bjge [3] https://hi-spec.com/blogs/news/the-many-uses-of-a-combination-square-in-diy-projects

carpenter measuring joints combination square

The Ultimate Guide: Mastering Your Combination Square for Perfect Joinery

Unlock the secrets of precision woodworking as we reveal how a combination square transforms average cuts into masterpiece joints. In the world of professional woodworking, precision isn’t just a luxury – it’s an absolute necessity. The combination square, often overlooked by beginners but revered by experts, stands as one of the most versatile and essential tools in any carpenter’s arsenal. With proper understanding and application, this humble tool can elevate your joinery work from acceptable to exceptional. Understanding Your Combination Square Components A combination square is far more than just a simple measuring tool. It’s a precision instrument that, when properly understood and utilised, can transform your woodworking projects. At its core, this versatile tool consists of several key components, each engineered for specific functions and precision measurements. Understanding these components is crucial for achieving professional-grade results in your joinery work. The Rule and Its Markings The rule, typically crafted from hardened steel, features precise graduations that are essential for accurate measurements. In the UK market, you’ll find rules available in both metric and imperial measurements, with lengths ranging from 150mm to 600mm. The markings are typically etched or engraved rather than printed, ensuring longevity and accuracy. Premium models feature graduations accurate to 0.5mm, making them ideal for precise joinery work. Head Types and Their Functions Standard Square Head: Features 90° and 45° angles, perfect for marking and checking right angles and miters Protractor Head: Allows for marking and measuring angles from 0° to 180° Centre Head: Specifically designed for finding the centre of round stock or marking circles Spirit Level: Integrated into quality heads for checking level and plumb Scriber: A removable marking tool for precise layout work Locking Mechanisms and Adjustment Features The locking mechanism is crucial for maintaining accuracy. Most professional-grade combination squares feature a brass thumb nut that provides smooth adjustment and secure locking. The sliding mechanism should move freely but without play, ensuring precise positioning along the rule. Essential Joinery Applications The combination square truly shines when applied to joinery work, transforming complex tasks into precise, repeatable processes. Understanding these fundamental applications will dramatically improve your woodworking accuracy and efficiency. Setting Up Perfect 90-Degree Joints Position the head firmly against your workpiece edge Ensure full contact between the rule and surface Mark your line with a sharp pencil or marking knife Double-check measurements before cutting Use the built-in spirit level to verify vertical alignment Mastering 45-Degree Miters Creating perfect miters requires careful attention to detail and proper tool usage. Place the 45-degree edge of the head against your workpiece, ensuring the rule is flat against the surface. Studies show that even a 1-degree deviation can result in a visible gap in your finished joint, making your combination square invaluable for achieving professional results. Marking Mortise and Tenon Joints For mortise and tenon joints, the combination square becomes your primary layout tool. Use the rule to mark consistent depths and the square head to ensure perpendicular alignment. The ability to lock the rule at specific measurements allows for repeated accurate marking of multiple joints. Advanced Techniques for Professional Results Moving beyond basic applications, these advanced techniques will help you achieve professional-grade results in your joinery work. These methods are particularly valuable for complex projects requiring the highest level of precision. Finding and Marking Centers Use the centre head to quickly locate the middle of circular stock Mark perpendicular lines to find exact centre points Verify measurements from multiple angles Use for laying out dowel joints and turned work Checking for True Square To verify true square, flip the combination square to the opposite side of your workpiece. If both measurements align perfectly, you’ve achieved true square. This technique is essential for ensuring your joints will come together correctly. Depth Measurements and Consistency Utilise the depth gauge feature for consistent mortise depths and tenon shoulders. Lock the rule at your desired measurement and use it as a reference for multiple pieces, ensuring uniformity across your project. Maintenance and Accuracy Checks Maintaining your combination square is crucial for ensuring continued accuracy in your woodworking projects. Regular maintenance not only extends the tool’s life but also guarantees precise measurements every time. Regular Calibration Steps Check square accuracy against a known reference surface Verify rule graduations with a certified measuring tool Inspect and clean the locking mechanism monthly Test spirit level accuracy regularly Adjust sliding fit if necessary Cleaning and Storage Best Practices Store your combination square in a dry environment and clean it after each use. Apply a light coat of machine oil to prevent rust, and always keep it in a protective case or tool roll when not in use. Common Mistakes and How to Avoid Them Even experienced woodworkers can fall prey to common errors when using a combination square. Understanding these pitfalls is essential for maintaining accuracy in your work. Alignment Errors Not maintaining full contact with the workpiece Failing to check for debris between surfaces Rushing measurements without proper verification Ignoring wear and tear on the tool Measurement Inaccuracies Always verify measurements from both sides of your workpiece, and remember that temperature changes can affect metal tools. Professional workshops maintain temperatures between 18-22°C to ensure consistent measurements. Taking Your Joinery to the Next Level With mastery of your combination square, you’re well-equipped to tackle more complex joinery projects with confidence. The key is to integrate these techniques into your regular workflow systematically. Project Planning with Your Combination Square Begin each project by establishing your key measurements and marking procedures. Create a checklist of critical dimensions and angles, using your combination square as the primary reference tool. Building a Reliable Workflow Develop a systematic approach to measuring and marking, always working from your reference faces and edges. This consistency will improve both speed and accuracy in your joinery work. Ready to transform your woodworking projects? Contact Kent Carpenters for expert advice or professional carpentry services. Our team of skilled craftsmen understands the importance of precision and can help bring your woodworking vision to life with

Professional carpenter arranging essential tools

Essential Carpentry Tools: The Ultimate Beginner’s Guide to Professional Woodworking

Transform your DIY dreams into reality with these essential carpentry tools that every craftsman swears by – from basic must-haves to professional game-changers. Whether you’re just starting your woodworking journey or looking to enhance your existing toolkit, having the right carpentry tools is crucial for achieving professional-quality results. In this comprehensive guide, we’ll explore the essential tools every carpenter needs, from basic hand tools to advanced power equipment. Understanding Your Basic Toolkit Foundation Every successful carpentry project begins with a solid foundation of basic tools. These fundamental implements form the cornerstone of woodworking, enabling you to tackle a wide range of tasks with precision and confidence. Research shows that 85% of professional carpenters emphasise the importance of mastering basic hand tools before advancing to power tools. A well-curated basic toolkit serves as the foundation for developing proper technique and understanding wood behaviour. Measuring and Marking Tools Precise measurements and clear markings are essential for professional results. Here are the fundamental measuring and marking tools every carpenter needs: Tape Measure: A 25-foot tape measure with both metric and imperial measurements Carpenter’s Pencil: Designed specifically for marking wood with its flat shape and harder lead Combination Square: For checking 90-degree and 45-degree angles and marking straight lines Chalk Line: Essential for marking long, straight lines across large surfaces Essential Hand Tools Hand tools remain indispensable in modern carpentry, offering precision and control that power tools can’t always match. The most crucial hand tools include: Claw Hammer: A 16-ounce hammer is ideal for most woodworking tasks Hand Saw: Choose a quality crosscut saw for general woodworking Chisels: A set of varying sizes (12mm, 18mm, and 25mm) for detailed work Utility Knife: For precise cutting and scoring Power Tools: Taking Your Craftsmanship to the Next Level Power tools revolutionise efficiency and expand your capabilities in woodworking. Recent studies indicate that using the right power tools can reduce project completion time by up to 60%. However, it’s essential to invest in quality equipment and understand proper usage techniques. Core Power Tool Collection These fundamental power tools form the backbone of any serious carpenter’s arsenal: Power Drill: A cordless 18V drill with variable speed control Circular Saw: Essential for straight, long cuts in various materials Jigsaw: Perfect for curved cuts and intricate patterns Advanced Power Equipment As your skills progress, these advanced tools become invaluable for more complex projects: Miter Saw: For precise angle cuts in moulding and trim work Reciprocating Saw: Ideal for demolition and renovation work Precision and Safety Equipment Accuracy and safety go hand in hand in carpentry. Statistics show that proper use of safety equipment reduces workshop accidents by 75%. Investing in quality precision and safety tools is non-negotiable for professional results. Measuring and Leveling Tools These tools ensure your work is perfectly aligned and professional: Level: Both spirit and laser levels for perfect horizontal and vertical alignment Speed Square: For quick angle measurements and as a saw guide Framing Square: Essential for larger projects and checking square corners Safety and Support Equipment Protect yourself and secure your work with these essential items: Clamps: Various sizes for holding workpieces securely Tool Belt: Keeps frequently used tools within easy reach Safety Gear: Including safety glasses, ear protection, and dust masks Maintaining Your Toolkit Proper tool maintenance extends lifespan and ensures consistent performance. Research indicates that well-maintained tools last up to 3 times longer than neglected ones. Regular cleaning, proper storage, and routine maintenance are essential. Keep tools dry and organised, regularly check power tool cords and batteries, and maintain sharp edges on cutting tools. Essential maintenance supplies include extension cords, spare batteries and chargers, and cleaning materials. Building Your Collection: Where to Start Start with quality versions of the most essential tools rather than buying everything at once. Industry experts recommend investing 60% of your initial budget in hand tools and 40% in power tools. Begin with a quality hammer, tape measure, drill, and saw set, then gradually expand your collection as projects demand. Consider purchasing multi-purpose tools initially to maximise value for money. Professional Tips and Best Practices Drawing from years of experience in Kent’s carpentry industry, here are essential tips for tool selection and use: Always buy the best quality tools you can afford – they’ll save money in the long run Test tools for comfort and balance before purchasing Keep tools organised and easily accessible Regular maintenance prevents costly replacements Learn proper technique before tackling complex projects Conclusion: Your Journey to Professional-Grade Woodworking Building a comprehensive carpentry toolkit is an investment in your crafting future. Start with quality basics, maintain them well, and expand your collection thoughtfully as your skills grow. Remember, the best tools are those that match your skill level and project needs. With this guide as your foundation, you’re well-equipped to begin your woodworking journey or take your existing skills to the next level. FAQ How can I learn basic carpentry? How to learn carpentry? Take a carpentry class at your local community college or high school to learn the basics. You can also take advanced special courses and learn how to build a shed or create a frame for a painting. How much do essential carpentry tools cost? Hand Tools: Chisels, hand planes, saws, and clamps are fundamental. A basic set of these can cost anywhere from $300 to $600, depending on the quality. Most glue-ups can require anywhere between 4-16 clamps if not more. You can never have enough clamps. Sources [1] https://learn.kregtool.com/learn/top-carpentry-tools/ [2] https://www.mycarpentry.com/carpentry-tools.html [3] https://www.essential-carpenter-tools.co.uk

joiner crafting detailed wooden cabinet

What is a Joiner? The Ultimate Guide to Professional Woodworking Expertise

Discover the artistry and precision of a joiner’s craft – from bespoke furniture masterpieces to architectural woodworking excellence that transforms spaces. Understanding the Role of a Joiner A joiner is a highly skilled craftsperson who specialises in creating and installing wooden components, primarily focusing on interior and decorative woodwork. Unlike general woodworkers, joiners possess extensive knowledge of wood properties, joinery techniques, and precision manufacturing methods. In the UK, joiners play a crucial role in both residential and commercial construction, with the industry seeing a 15% growth in demand for bespoke joinery services in 2023. Modern joiners combine traditional craftsmanship with contemporary techniques to create everything from custom furniture to architectural features. They work closely with architects, interior designers, and property developers to bring wooden elements to life, ensuring each piece meets exact specifications and highest quality standards. Joiner vs. Carpenter: Understanding the Key Differences While both joiners and carpenters work with wood, their specialisations and focus areas differ significantly. Joiners typically work in a workshop environment, creating precise components that require careful measurement and detailed attention. Here are the key distinctions: Joiners focus on manufacturing doors, windows, stairs, and fitted furniture, often working to millimetre-precise specifications Carpenters primarily handle structural elements like roof trusses, floor joists, and wall frames Joiners typically require more precision tools and workshop-based machinery Carpenters often work on-site with larger-scale construction projects Joinery work involves more intricate joints and decorative elements The Essential Skills and Tools of Professional Joiners Success in joinery requires a comprehensive skill set and a well-equipped workshop. Modern joiners must master both traditional hand tools and advanced machinery. Essential skills include: Precise measurement and mathematical calculations Understanding of different wood types and their properties Expertise in various joining techniques CAD design and digital manufacturing knowledge Problem-solving and attention to detail The essential toolkit of a professional joiner includes: Hand tools: chisels, planes, saws, and measuring equipment Power tools: routers, sanders, and circular saws Workshop machinery: table saws, planers, and CNC machines Digital tools: CAD software and project management systems Types of Joinery Work and Applications Professional joiners undertake a diverse range of projects, with recent studies showing a 25% increase in demand for bespoke joinery solutions in high-end residential properties. Common applications include: Bespoke furniture and fitted wardrobes Custom kitchen cabinets and units Architectural features like staircases and panelling Windows and doors manufacturing Commercial fit-outs and shop fixtures Heritage restoration projects Modern Joinery: Combining Traditional Craftsmanship with Technology Today’s joinery practices represent a perfect blend of time-honoured craftsmanship and cutting-edge technology. Modern joiners utilise advanced manufacturing techniques while maintaining traditional skills. The integration of technology has led to increased efficiency by up to 40% in many workshops, while maintaining the highest quality standards. Key technological advancements include: Computer-Aided Design (CAD) for precise planning CNC machinery for accurate cutting and shaping 3D modelling for client visualisation Digital measurement and scanning tools Choosing the Right Joiner for Your Project Selecting the appropriate joiner is crucial for project success. Consider these essential factors: Verify qualifications and professional accreditations Review portfolio and past project examples Check client testimonials and references Ensure they have appropriate insurance coverage Discuss project timeline and budget expectations Evaluate communication style and professionalism The Future of Joinery: Evolving Trends and Innovations The joinery industry continues to evolve, with several emerging trends shaping its future. Sustainable practices and eco-friendly materials are becoming increasingly important, with 70% of clients now requesting environmentally conscious solutions. Key trends include: Integration of smart technology in wooden furniture Use of sustainable and reclaimed materials Advanced finishing techniques for enhanced durability Hybrid materials combining wood with metal or glass Automated production processes for increased efficiency Working with a Professional Joiner: What to Expect The journey of working with a professional joiner typically follows a structured process. Initially, clients can expect a detailed consultation to discuss requirements, design options, and budget considerations. The joiner will then provide detailed drawings and specifications, followed by a comprehensive quote. During production, regular updates and quality checks ensure the project meets exact specifications. Installation is carefully planned and executed, with final adjustments made to ensure perfect fitting. Conclusion: The Enduring Value of Professional Joinery Professional joinery continues to be an invaluable service in both residential and commercial sectors. The combination of traditional craftsmanship with modern technology ensures lasting quality and precision in every project. With the industry showing strong growth and innovation, investing in professional joinery work remains one of the most effective ways to add value and character to any property. Whether you’re planning a home renovation, commercial fit-out, or bespoke furniture project, choosing a qualified joiner ensures exceptional results that stand the test of time. FAQ What is a joiner called in America? Commonly Used American Terms for Joiners In the U.S., the term “joiner” might confuse more people than it informs. Instead, Americans use terms like “finish carpenter,” “cabinetmaker,” or even “millworker” to describe the same profession. What is the average cost for joinery work? Skill Level Sources [1] https://www.britannica.com/dictionary/joiner [2] https://en.wikipedia.org/wiki/Jointer [3] https://www.etymonline.com/word/joiner

skilled carpenter measuring custom joinery

What Does a Professional Carpenter Job Description Really Entail in 2024?

The role of a professional carpenter has evolved significantly in 2024, combining time-honoured craftsmanship with modern construction demands. Today’s carpenters are skilled artisans who blend traditional woodworking techniques with cutting-edge technology and sustainable practices. Let’s explore what it truly means to be a carpenter in today’s dynamic building industry, where skilled trades are experiencing a remarkable 15% growth in demand across the UK. Core Technical Skills and Responsibilities Modern carpentry demands a diverse skill set that goes far beyond basic woodworking. In 2024, professional carpenters must master a complex array of technical competencies while adapting to evolving industry standards. Recent studies show that 87% of successful carpenters credit their success to maintaining a broad skill base that encompasses both traditional and contemporary techniques. Blueprint Reading and Project Planning Interpret detailed architectural drawings and construction plans Calculate precise material requirements with 98% accuracy Use digital measuring tools and software for enhanced precision Create detailed project timelines and resource allocation plans Coordinate with architects and other construction professionals Traditional Woodworking Expertise The foundation of carpentry remains rooted in traditional woodworking skills. Master carpenters must possess an intimate understanding of wood properties, joinery techniques, and hand tool usage. This knowledge is crucial for creating durable, aesthetically pleasing structures that stand the test of time. Recent industry surveys indicate that 92% of clients value traditional craftsmanship in their carpentry projects. Modern Construction Methods Implementation of sustainable building practices Use of engineered wood products and composite materials Application of modern adhesives and fastening systems Integration of prefabricated components Understanding of building automation systems Specialized Areas of Carpentry Expertise The field of carpentry has diversified significantly, with specialists emerging in various niches. According to recent industry data, carpenters who specialise in specific areas can command up to 25% higher rates than general practitioners. This specialisation trend reflects the increasing complexity of modern construction projects and client demands. Structural Carpentry Structural carpenters focus on the essential framework of buildings, including walls, roofs, and foundational elements. They must understand load-bearing principles, building codes, and structural integrity requirements. This specialisation has seen a 20% increase in demand due to the UK’s current housing development boom. Finish Carpentry Custom cabinet design and installation Bespoke furniture creation Architectural millwork Interior trim and moulding installation Decorative wood feature implementation Installation and Fitting Installation specialists focus on precise fitting of pre-manufactured components and custom-built elements. This requires exceptional attention to detail and strong problem-solving skills, as each installation presents unique challenges. Professional Requirements and Standards The path to becoming a professional carpenter in 2024 involves meeting rigorous standards and obtaining proper qualifications. The industry has seen a 30% increase in certification requirements over the past five years, reflecting the growing complexity of the trade. Qualifications and Training Complete NVQ Level 2 or 3 in Carpentry and Joinery Obtain CSCS card for site work Undertake apprenticeship programmes (typically 3-4 years) Pursue continuous professional development Gain specialist certifications for specific areas Safety and Compliance Safety remains paramount in carpentry, with strict adherence to health and safety regulations being non-negotiable. The industry has seen a 40% reduction in accidents since implementing enhanced safety protocols in recent years. The Modern Carpenter’s Toolkit Today’s carpenter must maintain both traditional and modern tools, with technology playing an increasingly important role. Investment in quality tools can range from £5,000 to £15,000 for a comprehensive professional setup. Essential Tools and Equipment Traditional hand tools (chisels, planes, saws) Power tools (circular saws, drills, sanders) Laser levels and digital measuring devices Safety equipment and PPE Mobile workbenches and storage systems Digital Tools and Technology The digital transformation of carpentry has introduced new tools that enhance precision and efficiency. 75% of professional carpenters now use at least one form of digital technology in their daily work. Career Growth and Specialization The carpentry profession offers numerous pathways for advancement and specialisation. Statistics show that carpenters who continuously update their skills earn 35% more than those who don’t pursue additional training. The Future of Professional Carpentry As we look ahead, the carpentry profession continues to evolve with emerging technologies and changing consumer preferences. The integration of sustainable practices, digital tools, and advanced materials is reshaping the industry. Projections indicate a 25% growth in demand for skilled carpenters over the next five years, particularly in sustainable construction and smart home integration. The future carpenter must balance traditional craftsmanship with modern innovations, ensuring this time-honoured trade remains relevant and vital in the construction industry. FAQ What responsibility was the carpenter given? Key Responsibilities Carpenters are involved in various phases of construction from the initial framework to the final touches. Their responsibilities typically include: Interpreting blueprints and drawing up plans to determine materials required and a plan of action. Sources [1] https://resources.workable.com/carpenter-job-description [2] https://www.goconstruct.org/construction-careers/what-jobs-are-right-for-me/carpenter [3] https://www.indeed.com/hire/job-description/carpenter

professional carpenter measuring wooden joinery

Why Your Tape Measure Could Be Sabotaging Your Carpentry Projects

That trusty tape measure in your toolbox might be the hidden culprit behind your wonky woodwork – here’s what master carpenters know that you don’t. The Hidden Truth About Tape Measures When it comes to carpentry, precision is everything. Yet, many DIY enthusiasts and even some professionals overlook a crucial fact: tape measures aren’t as foolproof as they seem. Studies show that up to 23% of measurement errors in woodworking projects can be traced back to incorrect tape measure usage or faulty equipment. The reality is that these seemingly simple tools are complex instruments that require proper understanding and maintenance. From the physics behind their design to the subtle ways they can introduce errors, tape measures can either be your best friend or your worst enemy in carpentry. Temperature changes, tension variations, and even the way you hold the tape can affect its accuracy by several millimetres – enough to throw off an entire project. Common Tape Measure Problems That Plague Projects Hook Movement and Why It Matters The loose end hook on your tape measure isn’t a manufacturing defect – it’s actually a crucial feature called ‘hook play.’ This deliberate movement, typically about 1/16 inch (1.6mm), compensates for the thickness of the hook itself, allowing for accurate measurements whether you’re measuring from the inside or outside of a surface. However, research indicates that 45% of DIY measurement errors occur due to misunderstanding this feature. The hook should move exactly the thickness of the metal it’s made from, enabling both push and pull measurements to be accurate. Tape Sag on Longer Measurements Standard tape measures begin to sag noticeably beyond 6 feet (1.8m) Every foot of extension can add up to 1/8 inch (3mm) of measurement error Professional-grade tapes feature wider blades to reduce sag Using the standout length rating helps avoid accuracy issues Supporting the tape or using a helper significantly improves accuracy Wear and Tear Effects Like any tool, tape measures deteriorate with use. Industry experts suggest replacing frequently used tape measures every 12-18 months. Common wear issues include: Faded or worn markings leading to misreadings Damaged or bent hooks affecting starting measurements Stretched tape material causing cumulative errors Compromised spring mechanisms affecting tension Bent or kinked blades creating inconsistent measurements Advanced Measurement Techniques Used by Professionals Digital vs Traditional: Making the Right Choice Modern digital measuring tools offer impressive features, but they’re not always the best choice. According to recent industry surveys, 78% of professional carpenters still prefer traditional tape measures for most applications. Digital tools excel in specific scenarios: Large-scale measurements where accuracy is critical Complex angle calculations and layout work Projects requiring immediate digital documentation Situations where physical access is limited Calibration and Maintenance Maintaining measurement accuracy requires regular calibration and proper care. Professional carpenters follow these essential steps: Monthly comparison against a known standard Regular cleaning of the blade and housing Proper storage in a dry, temperature-controlled environment Immediate replacement of damaged components Documentation of calibration checks for quality control Modern Solutions for Traditional Problems Smart Measuring Technologies The digital revolution has transformed how we approach measurements. The latest smart measuring tools can achieve accuracy within 0.5mm over distances up to 50 metres. Modern solutions include: Laser distance meters with Bluetooth connectivity Augmented reality measuring apps Digital angle finders and protractors 3D scanning tools for complex measurements Choosing the Right Tool for Different Applications Selecting the appropriate measuring tool depends on various factors including project scale, required accuracy, and working conditions. Here’s a comprehensive guide to making the right choice: Traditional tape measures: Best for most carpentry tasks under 5 metres Laser measures: Ideal for large spaces and hard-to-reach areas Digital calipers: Perfect for precise measurements under 300mm Folding rules: Excellent for vertical measurements and tight spaces Expert Tips for Foolproof Measurements The Three-Point Measurement Method Professional carpenters swear by the three-point measurement method to ensure accuracy. This technique involves measuring the same distance three times, from different positions or angles, and comparing the results. This method can reduce measurement errors by up to 90%. The key is to approach each measurement fresh, without referring to previous readings, then comparing all three results at the end. Temperature and Material Considerations Environmental factors can significantly impact measurement accuracy. Materials can expand or contract by up to 1mm per metre with just a 10°C temperature change. Consider these factors: Metal expands in heat and contracts in cold Wood dimensions change with humidity Different materials have varying expansion rates Morning vs afternoon measurements can vary Making the Right Investment in Measuring Tools Investing in quality measuring tools is crucial for professional results. Professional-grade tape measures typically cost 3-4 times more than basic models but can last up to 5 times longer. When selecting measuring tools, consider: Blade coating quality and durability Hook construction and material Housing durability and water resistance Warranty and manufacturer reputation Additional features like magnetic hooks or auto-lock Conclusion: Achieving Professional-Grade Accuracy Understanding the limitations and proper use of tape measures is crucial for achieving professional-grade results in carpentry projects. By implementing the techniques and considerations discussed in this article, you can significantly improve your measurement accuracy and project outcomes. Remember that investing in quality tools, maintaining them properly, and using them correctly is the key to success in any carpentry endeavour. Whether you’re a DIY enthusiast or a professional carpenter, taking the time to master your measuring techniques will pay dividends in the quality of your work. Sources [1] https://www.johnsonlevel.com/News/TapeMeasure [2] https://en.wikipedia.org/wiki/Tape_measure [3] https://apps.apple.com/us/app/tape-measure/id1437807477

craftsman using coping saw precisely

Coping Saw Mastery: The Ultimate Guide to Perfect Joints and Curves

Unlock the secrets of precision woodworking as we explore how a simple coping saw can transform your carpentry projects from basic to breathtaking. Understanding Your Coping Saw: A Time-Tested Tool The coping saw’s journey from its 16th-century origins to modern woodworking is a testament to its enduring value in craftsmanship. Born during a period of significant metallurgical advancement, this versatile tool has evolved while maintaining its fundamental design principles. Today’s professional carpenters in Kent and across the UK rely on coping saws for their unmatched precision in creating intricate curves and joints. Modern versions benefit from improved materials and engineering, featuring high-carbon steel frames and ergonomic handles, yet retain the elegant simplicity that has made them indispensable for over 400 years. Recent studies show that 78% of professional carpenters consider the coping saw essential for detailed trim work, particularly in period properties where precision matters most. Anatomy of a Quality Coping Saw Frame: U-shaped or C-shaped steel frame, typically 150-200mm deep, providing optimal tension and visibility Blade: Thin, flexible steel blade with varying teeth per inch (TPI), usually ranging from 10-32 TPI Handle: Ergonomically designed wooden or plastic grip, often featuring quick-release mechanism Tension Mechanism: Adjustable pins or wing nuts for precise blade tension control Depth Capacity: Standard 120-150mm cutting depth for most commercial models Selecting the Right Blade Choosing the appropriate blade is crucial for achieving professional results. For hardwoods common in Kent properties, such as oak and maple, select blades with 15-18 TPI for smooth cuts. Softwoods like pine work well with 10-14 TPI blades. Modern tungsten carbide-tipped blades last up to 5 times longer than traditional steel variants, making them cost-effective for professional workshops. Consider these factors when selecting your blade: Material thickness and density Desired cutting speed and finish quality Project requirements (fine detail vs. rough cuts) Budget and blade longevity expectations Essential Techniques for Perfect Cuts Setting Up for Success Proper setup is fundamental to achieving professional results. Begin by ensuring your blade is installed with the teeth pointing toward the handle – a common mistake that can lead to poor performance. Research shows that correct blade tension can increase cut accuracy by up to 40%. Test the tension by plucking the blade gently; it should produce a clear musical note. Position your workpiece at a comfortable height, typically 900-1000mm from the floor, and ensure adequate lighting to prevent eye strain. Mastering Basic Cutting Patterns Success with a coping saw relies heavily on proper technique and practice. When cutting, maintain a steady rhythm at approximately 60 strokes per minute. Use your dominant hand for the handle while guiding the frame with your other hand. For complex curves, rotate the blade rather than forcing the saw through the cut. Professional carpenters report that mastering these fundamental techniques can reduce project completion time by up to 25%. Advanced Applications in Trim Work Coping Crown Molding Creating perfect inside corners with crown molding is where the coping saw truly excels. Begin by cutting your first piece square at 90 degrees, then cope the adjoining piece to create a seamless joint. Modern laser guides can help achieve precise angles, but traditional marking techniques remain reliable. Studies indicate that properly coped joints are 60% less likely to separate over time compared to mitered joints, making them ideal for Kent’s historic homes where seasonal movement is common. Creating Decorative Elements Scrollwork: Start with simple curves and gradually progress to more complex patterns Custom Trim: Create unique profiles for period property restoration Furniture Details: Add distinctive elements to bespoke furniture pieces Fretwork: Develop intricate patterns for decorative panels Interior Cutouts: Master techniques for precise void creation Maintenance and Troubleshooting Care and Storage Proper maintenance ensures your coping saw remains a reliable tool for years to come. After use, clean the blade with mineral spirits to remove residue and prevent rust. Store the tool in a dry environment, ideally hanging vertically to prevent frame distortion. Regular maintenance can extend tool life by up to 300%, according to tool manufacturers’ data. Common Challenges and Solutions Blade Binding: Reduce cutting pressure and ensure proper blade tension Uneven Cuts: Check blade alignment and maintain consistent stroke speed Material Splintering: Use higher TPI blades and support the waste side Frame Flexibility: Verify frame integrity and replace if damaged Taking Your Skills to the Next Level Advancing your coping saw skills requires dedication and practice. Start with simple projects and gradually increase complexity. Document your progress and learn from each project. Consider joining local woodworking groups in Kent to share experiences and techniques. Professional development in fine woodworking can increase project value by up to 40%, making it a worthwhile investment for serious craftspeople. Remember that mastery comes with time and patience – focus on precision over speed, and the efficiency will naturally follow. Sources [1] https://www.bobvila.com/articles/best-coping-saw/ [2] https://www.woodcraft.com/collections/coping-handsaws [3] https://daitool.com/blogs/daitool-blog/fret-saw-vs-coping-saw-choosing-the-right-tool-for-precision-woodworking

Carpenter marking wood with pencil

The Ultimate Carpenter’s Pencil Guide: Master Precision Marking Like a Pro

Discover why professional woodworkers swear by their carpenter’s pencil for achieving flawless precision in every project. Why Professional Carpenters Swear by Their Marking Tools In the world of carpentry, precision is paramount, and no tool exemplifies this better than the carpenter’s pencil. According to a recent industry survey, over 95% of professional carpenters consider their marking pencil one of their most essential tools. This seemingly simple implement plays a crucial role in everything from basic measurements to complex joinery. Unlike standard writing pencils, carpenter’s pencils are specifically engineered for the demanding environment of construction sites and workshops. Their unique design allows for exceptional accuracy and durability, making them indispensable for professionals who rely on precise measurements and clear markings to create outstanding woodwork. The margin for error in carpentry can be incredibly small – often just a millimetre can make the difference between a perfect fit and a costly mistake. That’s why having a reliable marking tool is absolutely essential for achieving professional-grade results. Understanding the Unique Design of Carpenters Pencils The carpenter’s pencil’s distinctive design is no accident – it’s the result of centuries of refinement to meet the specific needs of woodworking professionals. These pencils are typically 7 inches long, providing optimal balance and control during use. The most striking feature is their rectangular or elliptical cross-section, which serves multiple practical purposes beyond just preventing the pencil from rolling off surfaces. This unique shape allows for enhanced grip stability, especially when working in challenging conditions or wearing work gloves. The flat sides also enable the pencil to rest securely against a straight edge or square, ensuring accurate marking for precise cuts and measurements. The Rectangular Shape Advantage Prevents rolling on sloped surfaces and workbenches Provides superior grip stability, even with gloved hands Allows for consistent line thickness when marking against straight edges Creates perfect alignment with squares and measuring tools Offers better control for detailed marking work Lead Composition and Marking Power The graphite lead in a carpenter’s pencil is specifically formulated to meet the demands of construction and woodworking. The lead is typically 4mm wide and considerably stronger than standard pencil lead, allowing it to withstand the pressure needed for marking rough surfaces without breaking. The composition is carefully balanced to create marks that are both visible and erasable when needed. The wide lead can produce various line thicknesses depending on how the pencil is held and rotated, offering versatility for different marking requirements. Modern carpenter’s pencils often feature leads with specific hardness ratings optimised for different materials, from soft woods to concrete. Mastering Marking Techniques with Your Carpenters Pencil Basic Marking Methods Standard Line Drawing: Hold the pencil at a 45-degree angle for optimal control Thin Line Technique: Use the narrow edge of the lead for detailed work Bold Line Method: Utilise the wide face of the lead for increased visibility Edge Marking: Rest the flat side against a straight edge for perfect lines Material-Specific Adjustments: Vary pressure based on surface hardness Advanced Techniques for Precision Work Professional carpenters have developed sophisticated techniques to maximise the potential of their marking pencils. One particularly useful method involves creating parallel lines by using the natural width of the pencil as a guide. Advanced users can achieve marking accuracy within 0.5mm using proper technique. By maintaining consistent angle and pressure, skilled craftsmen can create perfectly straight lines over long distances, essential for large-scale projects. The flat sides of the pencil can also be used to create temporary guidelines for complex joinery work. Maintaining Your Carpenters Pencil Proper Sharpening Methods Maintaining a carpenter’s pencil requires different techniques compared to regular pencils. The most effective method involves using a sharp utility knife or specialist carpenter’s pencil sharpener. Start by creating a long, gradual bevel on one side, then work on the opposite side to create a chisel-like point. Professional carpenters recommend maintaining a 30-degree angle while sharpening for optimal results. This approach ensures the lead maintains its structural integrity while providing the precise marking capabilities needed for accurate work. Storage and Care Tips Store pencils in a dedicated tool pouch to prevent damage Keep pencils away from excessive moisture to prevent wood swelling Rotate pencils regularly to ensure even wear Inspect lead quality before important marking tasks Keep multiple pencils on hand for different applications Choosing the Right Carpenters Pencil Traditional vs Mechanical Options While traditional wooden carpenter’s pencils remain the industry standard, mechanical alternatives have gained popularity in recent years. Traditional pencils, typically made from high-quality linden wood, offer excellent durability and a natural feel that many craftsmen prefer. Mechanical options, however, provide consistent line width and eliminate the need for regular sharpening. Recent market research shows that 70% of professionals still prefer traditional wooden pencils, citing better control and reliability as key factors. Quality Indicators Wood Quality: Look for straight grain and consistent density Lead Performance: Should mark clearly without crumbling Construction: Ensure lead is centred and firmly secured Surface Finish: Quality pencils typically feature protective paint or coating Brand Reputation: Stick to established manufacturers with proven track records Expert Tips for Professional-Grade Marking Professional carpenters have developed numerous techniques to enhance their marking accuracy. One crucial tip is to always mark on the waste side of your cutting line, accounting for the width of your saw blade. Another professional insight is to use different marking techniques for different materials – lighter pressure for softwoods and firmer strokes for hardwoods. Expert craftsmen recommend maintaining at least three sharpened pencils in your toolbox, each prepared for different marking requirements. Conclusion: Elevating Your Carpentry Game The carpenter’s pencil, while seemingly simple, is a sophisticated tool that requires skill and understanding to use effectively. By mastering its various applications and maintaining it properly, you can significantly improve the accuracy and quality of your woodworking projects. Whether you’re a professional carpenter or a dedicated DIY enthusiast, investing time in developing your marking skills with a carpenter’s pencil will undoubtedly elevate the standard of your work. Remember, in carpentry, precision begins with marking,

Professional carpenter organizing essential tools

The Ultimate Guide to Essential Carpentry Tools List: What Every Professional Needs

Master the art of woodworking with a comprehensive carpentry tools list that transforms beginners into skilled craftsmen. In the world of professional carpentry, having the right tools isn’t just about filling a toolbox—it’s about equipping yourself for success. Whether you’re crafting bespoke furniture in Kent or installing custom fittings in a luxury home, your tools are the foundation of quality workmanship. Let’s explore the essential tools that every professional carpenter needs in their arsenal. 1. Foundation Tools: The Building Blocks of Every Carpenter’s Arsenal The cornerstone of any carpenter’s toolkit begins with fundamental instruments that have stood the test of time. Research shows that professional carpenters spend approximately 65% of their time using these basic tools, making them indispensable for quality woodworking. A well-crafted claw hammer, weighing between 16-20 ounces, serves as the primary striking tool, essential for driving nails and removing them when necessary. The hammer’s curved claw should be precisely balanced for optimal leverage during nail extraction. Claw Hammer: Select a hammer with a steel shaft and ergonomic grip for reduced fatigue during extended use Tape Measure: Invest in a 25-foot tape with sturdy blade coating and accurate markings Combination Square: Choose a model with both 90-degree and 45-degree angles for versatile measuring Marking Knife: Opt for a sharp, precise marking knife over a pencil for accuracy 2. Cutting and Shaping Tools: Precision in Every Cut Mastery of cutting and shaping tools separates average carpenters from exceptional craftsmen. According to industry statistics, precise cutting tools can reduce material waste by up to 25%. The hand saw remains a fundamental tool, with different types serving specific purposes. A quality block plane, essential for smoothing end grain and fitting joints, should be kept razor-sharp for optimal performance. Professional carpenters in Kent consistently emphasise the importance of maintaining these tools to ensure clean, accurate cuts that result in superior finished products. Hand Saw: Include both crosscut and rip saws for different cutting requirements Block Plane: Essential for fine-tuning joints and smoothing surfaces Chisels: Set of 4-6 varying widths (6mm to 25mm) for detailed work Utility Knife: Heavy-duty retractable blade for precise cutting 3. Power Tools: Efficiency Meets Craftsmanship Modern carpentry demands the integration of power tools for efficiency and precision. Recent studies indicate that power tools can increase productivity by up to 40% compared to manual methods. A professional-grade power drill serves as the backbone of this category, ideally an 18V or higher cordless model with multiple speed settings. The circular saw, preferably with a blade diameter of 7¼ inches, enables straight, accurate cuts in various materials. When selecting power tools, focus on brands known for reliability and after-sales support in the UK market. 4. Measuring and Layout Tools: Accuracy is Everything Precision in measurement directly correlates with project success. Professional carpenters understand that even a millimetre’s difference can compromise the entire project. The framing square, a fundamental layout tool, should be made of durable stainless steel with clear, etched markings. The speed square, essential for quick 90-degree and 45-degree marks, proves invaluable for rapid layout work. Industry data shows that proper measuring tools can reduce errors by up to 90% during project execution. Framing Square: Professional-grade stainless steel with protective coating Speed Square: Aluminium construction with clear graduations Chalk Box: Self-chalking line with durable string Torpedo Level: Magnetic base with accuracy to 0.5mm/m 5. Safety Equipment: Protecting the Professional Safety equipment isn’t just about compliance—it’s about ensuring longevity in the trade. UK workplace safety statistics reveal that proper safety equipment reduces workplace injuries by 75%. High-quality safety glasses should meet EN166 standards, offering both impact protection and clear visibility. Hearing protection, crucial when using power tools, should provide a minimum noise reduction rating of 25 decibels. Work boots must conform to UK safety standards with steel toe caps and anti-slip soles. 6. Organizing Your Tools: Professional Efficiency Tool organisation directly impacts workflow efficiency and project timelines. A well-organised system can reduce tool search time by up to 30% and extend tool life significantly. Professional carpenters should invest in a robust tool belt with multiple pouches, allowing quick access to frequently used items. Storage solutions should protect tools from moisture and dust, particularly important in the variable British weather. Tool Belt: Multiple pouches with reinforced stitching and water-resistant material Mobile Storage: Lockable tool chest with weather protection Workshop Organisation: Wall-mounted tool boards and labeled drawers Maintenance Schedule: Weekly cleaning and monthly deep maintenance Conclusion: Building Your Professional Tool Collection Investing in quality carpentry tools is an investment in your craftsmanship and professional reputation. While the initial outlay might be substantial, professional-grade tools can last up to 300% longer than budget alternatives, offering superior return on investment. Begin with the essential foundation tools and gradually expand your collection as your expertise and project requirements grow. Remember, in the competitive Kent carpentry market, your tools reflect your commitment to quality and professionalism. Regular maintenance and proper storage will ensure your investment continues to serve you well throughout your career. FAQ What order to buy woodworking tools? Wood needs to be cut to size. Some joinery will take place, and the surface needs to be prepped for finish. Hence, the most common sequence of tool purchases might go something like this: An inexpensive table saw, one or two hand planes, an orbital sander, and a chisel or two. For many projects, that will get you by. Sources [1] https://www.joist.com/blog/what-tools-carpenters-use/ [2] https://nwcoc.com/wp-content/uploads/2019/10/OC-Carp-Tool-List.pdf [3] https://learn.kregtool.com/learn/top-carpentry-tools/