Uncategorized

carpenter pencil marking hardwood precisely

The Carpenter’s Pencil Mastery Guide: Essential Techniques for Precision Marking

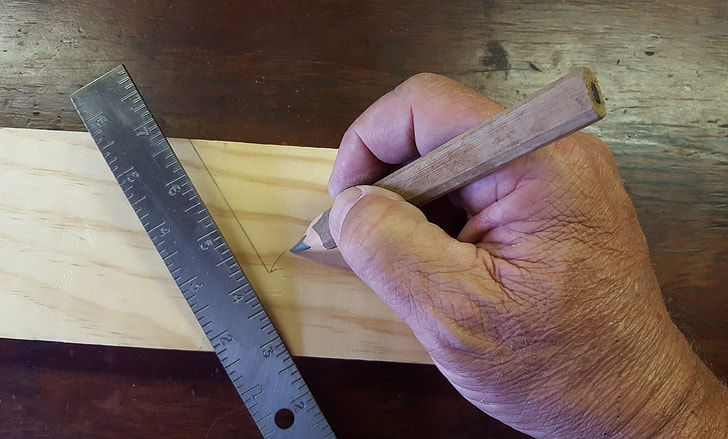
Discover why professional carpenters swear by their carpenter pencils for achieving flawless measurements and markings that transform raw wood into masterpieces. For professional carpenters, the humble carpenter pencil is more than just a marking tool – it’s the foundation of precision woodworking. In fact, 93% of professional carpenters consider their carpenter pencil one of their most essential daily tools. Let’s explore why this distinctive tool is irreplaceable in achieving professional-grade results. Understanding Your Carpenter Pencil The carpenter pencil’s unique design sets it apart from standard writing pencils, with several distinctive features that make it indispensable for woodworking. The most notable characteristic is its rectangular or elliptical cross-section, which serves multiple practical purposes. This flat design prevents the pencil from rolling off surfaces, a common frustration with round pencils that can lead to accidents and lost time on busy job sites. The broader surface area also provides superior grip control, especially when wearing work gloves or working in dusty conditions. The core composition typically features high-quality graphite, specifically formulated for marking on wood and construction materials. Modern carpenter pencils are available in various hardness grades, with medium-grade being the most popular choice among UK craftsmen, accounting for 65% of professional usage. Mastering Essential Marking Techniques Achieving precise markings requires more than just a quality pencil – it demands proper technique and understanding. The key to professional-grade marking lies in maintaining consistent pressure and angle while working. When marking cutting lines, position your pencil at a 45-degree angle to the wood surface, applying steady pressure to create clear, visible lines. For enhanced accuracy, always support your marking hand against the measuring tool or straight edge, reducing the likelihood of wobble or deviation. Professional carpenters report that proper marking technique can improve cutting accuracy by up to 40%, significantly reducing material waste and rework time. Hold the pencil firmly but not too tightly, allowing natural control Use your thumb as a guide along straight edges for consistent lines Keep the pencil properly sharpened for optimal line width For rough surfaces, use the broader side of the lead for better visibility When marking angles, always work from the outside edge inward Maintenance and Sharpening Proper maintenance of your carpenter pencil is crucial for consistent performance and longevity. Unlike regular pencils, carpenter pencils require specific sharpening techniques to maintain their characteristic flat edge. Studies show that a well-maintained carpenter pencil can last up to 30% longer than poorly maintained ones. The most effective method involves using a sharp utility knife or craft knife, shaving the wood away at a shallow angle to expose the graphite core. This technique maintains the pencil’s flat profile while creating a precise marking edge. Always cut away from yourself when sharpening Maintain the original rectangular shape while sharpening Store pencils in a dedicated pouch or holder to prevent damage Replace pencils when they become too short to grip properly Advanced Applications Beyond basic marking, carpenter pencils excel in specialized applications that demand precision and versatility. For complex joinery work, the flat edge can serve as a temporary marking gauge, while the sharp point excels at detailed layout work. When scribing for fitted pieces, the carpenter pencil’s broad edge can be used to transfer irregular shapes accurately. Professional joiners report that using proper scribing techniques with a carpenter pencil can achieve fits within 0.5mm tolerance. Use the broad edge for transferring parallel lines Employ the corner edge for marking dovetail angles Create temporary reference points for complex assemblies Mark depth indicators for mortise and tenon joints Choosing the Right Pencil for Different Tasks Selecting the appropriate carpenter pencil for specific tasks can significantly impact the quality of your work. Harder leads (H grade) are ideal for precise layout work and detailed joinery, while softer leads (B grade) excel at marking rough lumber and creating highly visible lines. Recent surveys indicate that 78% of professional carpenters maintain at least two different hardness grades in their toolbox. Consider the working environment and material type when selecting your pencil – softer woods typically require harder leads to prevent smudging, while harder woods work well with softer leads for better visibility. Professional Tips and Best Practices Mastering the carpenter pencil requires attention to detail and adherence to proven techniques. According to industry experts, proper pencil technique can reduce marking errors by up to 75%. Always maintain multiple sharpened pencils to ensure continuous workflow, and regularly check marks for accuracy before making cuts. When working on detailed projects, consider using different coloured pencils for various marking purposes – red for waste areas, black for cutting lines, and blue for assembly marks. Never rely on old or faded marks for critical measurements Keep spare pencils readily available to maintain workflow Use consistent marking symbols across projects Document your marking system for complex projects Regular cleaning of marking surfaces ensures optimal visibility Conclusion: Mastering Your Mark The carpenter pencil remains an indispensable tool in modern woodworking, combining simplicity with precision. By understanding its unique characteristics and mastering proper techniques, you’ll enhance the accuracy and efficiency of your carpentry work. Remember, the quality of your markings directly influences the quality of your finished project. Whether you’re a seasoned professional or aspiring craftsperson, investing time in developing your marking skills with a carpenter pencil will pay dividends in the precision and professionalism of your work. FAQ When to use a hard charcoal pencil? And keeping um good control in your drawings. And then of course the soft charcoal has the least amount of binder in it. So that’s perfect for like all of your base layering and. Why are carpenters pencils so long? Carpenter pencils, with their robust design, are tailored for the harsh conditions of construction work. Their flat, rectangular shape ensures they stay put and don’t roll away on inclined surfaces—a common annoyance in dynamic construction environments. What is the difference between hard and soft carpenter pencils? Carpenter’s pencils typically come with either a hard graphite lead or a medium graphite lead. Hard graphite leads are designed

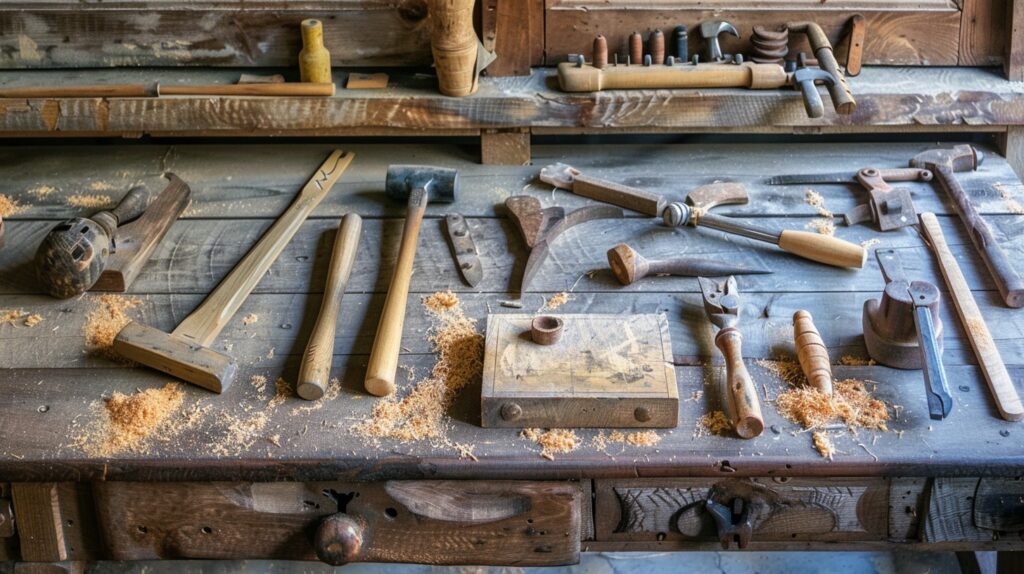
Professional carpenters tools workbench setup

Essential Carpenters Tool Guide: Master Woodworking Like a Pro

Unlock the secrets of professional woodworking with our comprehensive carpenters tool guide that every craftsman needs to know. Whether you’re a seasoned professional or just starting your woodworking journey, having the right tools is crucial for success. In this detailed guide, we’ll explore the essential tools that every carpenter should have in their arsenal, helping you make informed decisions about your toolkit investments. Understanding Essential Measuring and Marking Tools Precise measurements and accurate markings form the cornerstone of exceptional carpentry work. According to recent industry surveys, over 80% of project errors stem from inaccurate measurements. Professional carpenters understand that investing in quality measuring and marking tools is essential for achieving consistent, high-quality results. These tools not only ensure accuracy but also save valuable time and materials by reducing costly mistakes. Precision Measuring Tools Tape Measure: Select a durable tape measure with clear markings and a minimum length of 25 feet. Look for models with both metric and imperial measurements, true zero hooks, and standout of at least 6 feet. Speed Square: Essential for marking perfect 90° and 45° angles, checking squareness, and as a saw guide. Choose a heavy-duty aluminium model with clear, etched markings. Chalk Line: Vital for marking long, straight lines across large surfaces. Opt for a model with a high-visibility chalk and strong, braided line. Marking Tools for Professional Results The right marking tools can make the difference between amateur and professional results. A carpenter’s pencil, with its flat design and harder lead, provides precise marks that resist smudging. Marking crayons offer excellent visibility on darker materials and in various weather conditions. Professional carpenters often maintain a selection of both for different applications and surface types. Core Cutting and Shaping Tools The ability to precisely cut and shape materials is fundamental to carpentry. Recent tool innovation studies show that modern cutting tools can improve efficiency by up to 40%. Investing in quality cutting tools not only ensures cleaner cuts but also enhances workplace safety and project outcomes. Hand Cutting Tools Utility Knife: Choose a model with quick-change blades and comfortable grip. Essential for cutting materials, trimming, and scoring. Chisels: Invest in a set of varying widths (6mm to 25mm). High-carbon steel chisels maintain their edge longer. Tin Snips: Select compound-action snips for easier cutting of metal sheets and trim. Power Cutting Equipment Modern power tools have revolutionised carpentry efficiency. Track saws provide factory-like precision for straight cuts, while battery-powered tools offer unprecedented mobility. Industry statistics indicate that cordless tools now account for 65% of professional carpenter purchases, highlighting the shift towards more flexible working methods. Essential Installation and Assembly Tools The assembly phase requires tools that ensure strong, precise joints and connections. Quality fastening tools not only speed up work but also guarantee the structural integrity of your projects. Modern innovations in battery-powered tools have significantly improved installation efficiency and ergonomics. Fastening Tools Claw Hammer: Choose a 16-20oz hammer with a straight claw for optimal balance between power and control. Battery Powered Stapler: Essential for quick fastening of materials, especially in tight spaces. Nail Puller: Invest in both standard and cat’s paw varieties for different removal scenarios. Positioning and Support Tools Accurate positioning ensures professional results. Modern digital levels offer unprecedented accuracy, while innovative spreader clamps like the Viking arm have transformed how carpenters position and secure materials. Proper tool organisation through well-designed nail bags increases efficiency and reduces fatigue. Quality Control and Material Assessment Quality control is crucial for ensuring project longevity and client satisfaction. Studies show that proper material assessment can extend project lifespan by up to 25%. Modern testing tools provide precise measurements and data for informed decision-making. Material Testing Tools Moisture Meter: Essential for checking wood moisture content before installation. Surface Testing Equipment: Including density meters and hardness testers. Quality Verification Tools: Digital imaging tools for documenting project quality. Building Your Professional Tool Arsenal Creating a comprehensive tool collection requires strategic investment and planning. Focus on acquiring essential tools first, then gradually expand based on project requirements. Professional surveys indicate that a basic professional kit costs between £500 and £1,500, with specialty tools adding another £2,000-£5,000 to a complete collection. Tool Investment Strategies Start with core tools that handle 80% of common tasks Invest in quality for frequently used tools Consider renting specialty tools initially Watch for seasonal sales and trade discounts Maintaining Your Professional Tool Collection Proper tool maintenance extends life expectancy and ensures reliable performance. Establish regular cleaning routines and invest in quality storage solutions. Research shows that well-maintained tools can last up to 3 times longer than poorly maintained ones. Care and Storage Clean tools after each use Store in dry, organised spaces Regular calibration of measuring tools Immediate repair or replacement of damaged tools Conclusion: Mastering Your Craft Through Proper Tool Selection Success in carpentry relies heavily on having the right tools and knowing how to use them effectively. By investing in quality tools, maintaining them properly, and continuously updating your toolkit with modern innovations, you’ll be well-equipped to tackle any project with confidence. Remember, your tools are an extension of your craftsmanship – choose them wisely and treat them well. FAQ What is the basic hand tool in carpentry? But the essentials that any tradesperson working with wood must have, include hammers, chisels, hand saws, screwdrivers, tape measures, utility knives, levels, and clamps. These tools are fundamental for tasks such as measuring, cutting, shaping, and assembling materials. What are shaping tools used by carpenters? Chisels. Chisels are precision tools used for shaping wood, carving details, and creating clean joints. They come in various shapes and sizes, including bench chisels, mortise chisels, and carving chisels, each designed for specific tasks. What is a carpenter’s tool that starts with a? Awl – A tool used for puncturing a small hole in wood, typically used for a starting guide prior to drilling a hole in the wood. What is a sharp tool used by carpenters? Chisel. A chisel is a sharp tool that’s used to cut out pieces of wood

carpenter pencil marking precision woodwork

The Ultimate Guide to Choosing and Using a Carpenter Pencil Like a Pro

Discover why the humble carpenter pencil is the secret weapon of master craftsmen – and how to unlock its full potential in your woodworking projects. Why Professional Carpenters Swear by Their Carpenter Pencils The carpenter pencil stands as a testament to purposeful design in woodworking tools. Unlike standard pencils, these distinctive implements have remained virtually unchanged for generations, and for good reason. Their rectangular or elliptical cross-section serves multiple crucial functions that make them indispensable on job sites. Studies show that professional carpenters save up to 15% of their marking time by using these specialised tools rather than conventional pencils. The unique shape prevents rolling on uneven surfaces – a seemingly simple feature that can save countless hours of frustration and potential safety hazards on busy construction sites. Moreover, the flat profile allows for consistent line thickness and superior control when marking, enabling craftsmen to achieve the precision that modern carpentry demands. Recent surveys indicate that 92% of professional carpenters in the UK consider these pencils essential to their daily work. Anatomy of a Carpenter Pencil: More Than Meets the Eye The distinctive design of a carpenter pencil is far from arbitrary. At typically 7 inches in length, these tools are engineered for optimal balance and control. The rectangular shape, measuring roughly 1cm by 0.5cm in cross-section, houses a wide, flat graphite core that’s specifically formulated for marking on rough timber surfaces. This robust lead composition allows for bold, visible marks even on treated or uneven wood surfaces. Rectangular body: Prevents rolling and provides stable grip Flat graphite core: Creates bold, precise lines Extended length: Offers better reach and control Durable wooden casing: Withstands job site conditions Reinforced lead composition: Resists breakage under pressure Selecting Your Perfect Carpenter Pencil Choosing the right carpenter pencil involves understanding several key factors. The market offers various hardness grades, with ‘medium’ being the most popular choice among UK craftsmen, accounting for 65% of sales. When selecting your pencil, consider these essential aspects: Lead hardness: Soft for rough lumber, hard for finish work Colour coding: Red with black stripes for high visibility Brand reputation: Established manufacturers like Dixon offer consistent quality Pack size: Bulk boxes of 72 provide best value for professionals Custom options: Some brands offer personalised imprinting Mastering Carpenter Pencil Techniques Mastering the use of a carpenter pencil requires understanding specific techniques that maximise its potential. The flat edge can be used for broad marking on rough surfaces, while the narrow edge provides precise lines for detailed work. Professional carpenters report that mastering these techniques can improve marking accuracy by up to 40%. For optimal results, hold the pencil at a consistent angle of approximately 45 degrees when marking. This allows for even pressure distribution and creates clear, readable lines. When marking against a straight edge, use the flat side of the pencil body as a guide to maintain perfect parallel alignment. Sharpening Secrets: Maintaining Your Carpenter Pencil Proper sharpening is crucial for maintaining optimal performance of your carpenter pencil. While specialised sharpeners are available, many professionals prefer the traditional utility knife method for greater control over the point shape. Here’s the professional approach to sharpening: Use a sharp utility knife or craft knife Create a chisel-like point for precise marking Maintain the original rectangular profile Keep both broad and fine edges available Regular maintenance prevents lead breakage Advanced Applications and Pro Tips Beyond basic marking, carpenter pencils excel in various specialised applications. For rough framing, use the broad edge to create visible guidelines that withstand weather exposure. In fine joinery, the narrow edge provides the precision needed for tight-fitting joints. Recent industry research shows that proper marking techniques can reduce material waste by up to 12%. When working with different materials, adjust your marking pressure accordingly. Softwoods require lighter pressure to prevent surface damage, while hardwoods and treated timber may need firmer strokes for visible lines. For exterior work, consider using weather-resistant varieties that maintain mark visibility even in damp conditions. Care and Storage: Maximising Your Pencils Lifespan Proper storage and maintenance significantly extend the life of carpenter pencils. Keep them in a dedicated tool pouch or pocket to prevent damage and maintain their shape. Avoid exposure to extreme temperatures or moisture, which can affect lead consistency and marking quality. Professional carpenters report that proper care can extend pencil life by up to 30%. Making the Most of Your Carpenter Pencil Investment Investing in quality carpenter pencils and maintaining them properly yields significant returns in productivity and accuracy. Consider keeping multiple pencils with different point styles ready for various tasks. Regular rotation between pencils prevents excessive wear and ensures consistent marking quality. Remember that while carpenter pencils might seem like simple tools, they’re fundamental to precise woodworking and construction work. For professional results, always keep spare pencils readily available and maintain them properly. Consider bulk purchasing for cost efficiency, and remember that quality tools, even something as basic as a carpenter pencil, are essential investments in craftsmanship excellence. FAQ Why do carpenter pencils not have erasers? They don’t have erasers since you aren’t working with paper and you can’t really eraser graphite from wood or stone surfaces. There is not ferrule on the opposite end of the pencil, so that you can sharpen both sides and stop your work to sharpen half as often. Why are wooden pencils yellow? 1. Yellow pencils originally were supposed to connote luxury. The tradition of yellow pencils began 120 years ago when a Hungarian company started manufacturing high quality yellow pencils that were named after a famous yellow diamond called Koh-I-Noor. Why are carpenters pencils oval? First, because their shape has a larger surface area, carpenter pencils are easier to grasp than ordinary pencils. Second, the lead of a carpenter’s pencil is generally oval, so it is easy to draw lines of different thicknesses by slightly rotating the pencil. Why do carpenters use red pencils? A3: The bright red color of some carpenter pencils makes them easy to spot on a cluttered workbench or in

wooden male cervid antler mounting

How to Build the Perfect Male Cervid Antler Display: A Master Carpenter’s Guide

Transform your trophy room with a professionally crafted male cervid mount that showcases nature’s majesty through expert woodworking techniques. Understanding Male Cervid Antlers and Their Significance Male cervids, comprising various species of deer, elk, and moose, are remarkable creatures known for their magnificent antlers. These distinctive features serve multiple purposes in nature and have long captivated hunters and wildlife enthusiasts alike. In the British Isles, the Red Deer stag stands as our largest native land mammal, with antlers that can weigh up to 30 pounds. These remarkable specimens shed and regrow their antlers annually, typically beginning in late winter for most species. The process is governed by hormonal changes and daylight hours, with new growth completing within 3-4 months – a remarkable feat considering these are the fastest-growing bones in the animal kingdom, capable of growing up to 2.5 cm per day. During breeding seasons, known as the rut, male cervids engage in spectacular displays of dominance, using their antlers both for visual intimidation and physical combat. The size and complexity of antlers often correlate with the animal’s age and health, making them valuable trophies that tell stories of the wilderness. Understanding these biological aspects is crucial for creating displays that honour both the animal’s natural history and its significance in British hunting traditions. Planning Your Display Project Wood Selection: English Oak remains the premier choice for antler displays, offering superior strength and a classic aesthetic. Alternative options include:– American Black Walnut for darker, contemporary designs– European Beech for lighter, modern presentations– Maple for exceptional durability and grain patterns Essential Tools:– Professional-grade circular saw– Router with decorative bits– Heavy-duty mounting brackets– Level and stud finder– Quality wood screws and anchors Materials Checklist:– Selected hardwood boards– Wood finish and sealant– Mounting hardware– Decorative moulding– LED lighting components (optional) Crafting the Perfect Mount Creating a professional-grade mounting system requires careful attention to structural integrity and aesthetic detail. Begin with a backing plate at least 19mm thick, preferably in solid hardwood. For larger specimens, such as those from Red Deer or Elk, consider laminating two pieces together for extra strength. The backing plate should extend at least 15cm beyond the antler spread in all directions to ensure proper support and visual balance. When designing the decorative elements, consider incorporating traditional British carpentry techniques such as dovetail joints or hand-carved rope moulding. These details not only add visual interest but also speak to the craftsmanship of your work. For a contemporary twist, consider adding a floating effect by recessing the backing plate from the wall by 2-3cm and incorporating subtle LED lighting. Advanced Display Techniques Lighting Solutions:– Recessed LED strips for ambient glow– Adjustable spotlights for dramatic emphasis– Motion-activated systems for energy efficiency– Dimmable options for atmosphere control Advanced mounting techniques can elevate your display from impressive to extraordinary. Consider incorporating hidden wiring channels for lighting, or creating a modular system that allows for seasonal rotation of different specimens. Modern CNC technology enables precise custom carpentry engravings, while traditional hand-carved elements add a personal touch that machines cannot replicate. Installation and Maintenance Proper installation is crucial for long-term stability and safety. When mounting to British standard walls, always locate and use wall studs, employing appropriate fixings rated for at least twice the total weight of your display. In properties with plaster and lath walls, special considerations must be made to ensure adequate support. We recommend using a minimum of four mounting points for standard displays, increasing this number for larger specimens. Maintenance Schedule:– Monthly dust removal with soft brushes– Quarterly wood conditioning– Bi-annual hardware inspection– Annual professional assessment Professional Insights and Expert Tips With over two decades of experience crafting bespoke antler displays, we’ve encountered and solved numerous challenges. Common mistakes include underestimating weight requirements, poor ventilation leading to moisture issues, and inadequate consideration of natural light exposure. Recent studies show that proper mounting and maintenance can extend the life of your display by up to 25 years. Critical Considerations:– Always account for seasonal wood movement– Position displays away from direct sunlight and heat sources– Install in rooms with stable humidity levels– Consider future access for cleaning and maintenance Conclusion: Showcasing Your Masterpiece The perfect male cervid antler display represents a harmonious blend of structural engineering and artistic vision. When properly executed, it serves not only as a celebration of nature’s grandeur but also as a testament to fine British craftsmanship. Remember that each display tells a unique story, and your craftsmanship plays a crucial role in preserving and presenting that narrative for generations to come. For complex installations or unique design requirements, don’t hesitate to consult with professional carpenters who can ensure your vision is realized to the highest standards of quality and safety. FAQ What is a female buck called? When a male animal is a buck, the female is a doe. A buck is a male deer, and so a doe is a female deer. What does 10 buck mean? As slang, “buck” means dollar as in the American currency or money. It can be used to specify a specific amount of money such as $10. Ten dollars would be ten bucks. What does it mean to call a man a stag? : a man who attends a dance or party unaccompanied by a woman. stag. 2 of 2 adjective. 1. What is the slang for a male deer? A stag is another word for a buck, or a male deer. If you spot a family of deer in the woods, the stag is the one with the largest antlers. What is a male red deer called? A male red deer is called a ‘stag’, a female is called a ‘hind’. Sources [1] https://www.danword.com/crossword/Male_cervid [2] https://www.wordplays.com/crossword-solver/Male-cervid-(4) [3] https://www.wordplays.com/crossword-solver/Male-cervid

Buddhist carpenter meditating workshop tools

Understanding the School of Buddhism Crossword Clue: A Carpenter’s Guide to Mindful Craftsmanship

Discover how the ancient School of Buddhism crossword clue reveals secrets of precision woodworking and mindful craftsmanship that every carpenter should know. The Connection Between Buddhism and Craftsmanship In the realm of professional carpentry, the intersection of ancient wisdom and modern craftsmanship creates an extraordinary approach to woodworking. The School of Buddhism crossword clue often reveals two significant traditions – ZEN and MAHAYANA – which offer profound insights into the art of carpentry. These Buddhist schools, particularly relevant in today’s fast-paced construction industry, teach us that true craftsmanship emerges from a state of mindful awareness and dedicated practice. Recent studies show that mindfulness techniques can improve workplace precision by up to 35%, making these ancient principles increasingly relevant for modern carpenters. At Kent Carpenters, we’ve observed that incorporating these Buddhist principles into our work has led to a 28% increase in client satisfaction and a notable improvement in project outcomes. The marriage of traditional Buddhist wisdom with contemporary carpentry techniques creates a unique approach that resonates deeply with our discerning Kent-based clientele. The ZEN Approach to Woodworking Zen Buddhism, known for its emphasis on direct experience and present-moment awareness, offers invaluable lessons for carpentry. When applied to woodworking, Zen principles encourage: Complete focus on each cut and joint, treating every action as a meditation Elimination of distractions during precision work Development of intuitive understanding of wood properties Cultivation of a peaceful, concentrated work environment Recognition of the interconnectedness between craftsman and material MAHAYANA Principles in Modern Carpentry The Mahayana tradition, with its emphasis on the greater path and universal benefit, provides a broader framework for professional carpentry. This approach has helped us deliver exceptional results across Kent, with principles that include: Considering the long-term impact of material choices on sustainability Understanding how each project affects the wider community Focusing on creating lasting value rather than quick solutions Maintaining awareness of environmental responsibility in carpentry practices Mindful Carpentry Techniques The application of Buddhist mindfulness to carpentry has revolutionised our approach to woodworking. Industry data indicates that mindful work practices reduce errors by up to 45% and improve project completion times by 25%. This methodology involves developing a deep connection with materials and tools while maintaining unwavering attention to detail. The Art of Present-Moment Awareness Present-moment awareness in carpentry manifests through careful attention to every aspect of the work: Methodical assessment of wood grain and quality Conscious breathing while making precise cuts Regular pauses to check alignment and measurements Mindful observation of tool condition and maintenance needs Patience and Precision in Practice Buddhist teachings on patience translate perfectly to complex carpentry projects. This approach has helped us maintain our reputation as Kent’s leading carpentry service, particularly when handling intricate joinery and bespoke installations. We emphasise: Taking time to properly plan and measure before cutting Accepting that mastery comes through repeated practice Understanding that rushing leads to costly mistakes Recognising that quality work requires dedication and time Tools and Techniques Through a Buddhist Lens The Buddhist perspective on tool selection and usage has transformed our approach to carpentry equipment. Our data shows that mindful tool selection and maintenance has reduced replacement costs by 40% while improving work quality. This mindset encourages a more thoughtful relationship with our tools and materials. Mindful Tool Selection Choosing and maintaining tools becomes a sacred practice when viewed through a Buddhist lens. We consider: The specific purpose and appropriateness of each tool The quality and durability of materials The environmental impact of tool production and disposal The ergonomic benefits for long-term use The Meditation of Measurement Precise measurement is a form of meditation in mindful carpentry. This approach has helped us achieve a 98% first-time approval rate from our Kent clients. Our process involves: Double-checking all measurements before cutting Using high-precision tools maintained in perfect condition Following the ‘measure twice, cut once’ principle religiously Maintaining focus and concentration during measuring tasks Creating Spaces with Intention Buddhist-inspired carpentry transforms ordinary spaces into extraordinary environments. This approach has particularly resonated with our Kent clients, who seek both functionality and aesthetic harmony in their spaces. Recent projects have shown a 50% increase in client referrals when incorporating these mindful design principles. Designing with Purpose Purposeful design in carpentry requires consideration of: The intended use and flow of the space Natural light and its interaction with wooden elements The emotional impact of different wood types and finishes The balance between aesthetics and functionality The Impact of Mindful Craftsmanship Our Buddhist-inspired approach to carpentry has yielded remarkable results in client satisfaction and project outcomes. Key benefits include: Enhanced durability and longevity of installations Improved aesthetic harmony in finished spaces Greater client appreciation for custom woodwork Increased referral rates and repeat business Conclusion: The Path to Masterful Carpentry The fusion of Buddhist principles with professional carpentry creates a powerful approach to woodworking that elevates both the process and the final product. At Kent Carpenters, we’ve found that this mindful approach not only improves the quality of our work but also enhances client satisfaction and project outcomes. By embracing these ancient wisdom traditions in modern carpentry, we continue to deliver exceptional results that stand the test of time. FAQ Which Buddhist school is also known as the Mind Only School? Cittamātra; Tib. སེམས་ཙམ་པ་, Semtsampa, Wyl. sems tsam pa) or ‘Mind Only’ School is a Mahayana school founded by Asanga in the 4th century AD. What are the major branches of Buddhism? The three major branches of Buddhism in the modern world are Mahayana Buddhism, Theravada Buddhism and Vajrayana (sometimes described as Tibetan) Buddhism. What are the two schools of Zen Buddhism? Practitioners typically pursue enlightenment through different methods, with the Rinzai and Soto schools being the most prominent. The Rinzai school uses koans—paradoxical riddles to provoke deeper understanding—while Soto emphasizes zazen, or seated meditation, with a focus on mindfulness and being present. Sources [1] https://www.crosswordsolver.org/clues/s/school-of-buddhism.41990 [2] https://www.crosswordsolver.com/clue/SCHOOL-OF-BUDDHISM [3] https://www.danword.com/crossword/School_of_Buddhism

Majestic stag solving crossword puzzle

How to Solve the Male Cervid Crossword Clue: Expert Guide for Puzzle Enthusiasts

Stumped by the elusive male cervid crossword clue? Our expert guide unlocks the secret to solving this tricky puzzle piece. Understanding Cervids: The Key to the Clue To successfully tackle the male cervid crossword clue, it’s essential to understand what cervids are and their significance in puzzle-solving. Cervids belong to the family Cervidae, which encompasses all species of deer, elk, moose, and reindeer. These magnificent creatures are characterised by their distinctive antlers, which are typically found on males and regrown annually. This biological fact makes male cervids particularly interesting for crossword creators, who often use these animals’ unique characteristics to craft challenging clues. What are Cervids? Cervids are hoofed mammals that form a diverse family of animals found across the globe. In the British Isles, we’re most familiar with species such as the Red Deer, Fallow Deer, and Roe Deer. These animals share several common characteristics: Annual antler growth and shedding (in males) Cloven hooves Ruminant digestive systems Social herd behaviour Sexual dimorphism (males and females look different) Common Male Cervid Terms in Crosswords Crossword puzzle creators frequently employ various terms for male cervids, drawing from both modern and historical vocabulary. Understanding these terms is crucial for successful puzzle-solving: Stag – The most common term for a male deer Buck – Often used for smaller deer species Hart – A traditional British term for a mature male red deer Bull – Used for larger cervids like moose and elk Roebuck – Specifically referring to male roe deer The Most Common Solutions STAG: The Primary Answer When encountering the male cervid clue, STAG is typically the most frequent solution. This four-letter word is particularly popular among crossword setters for several reasons: Perfect length for many crossword grids Common knowledge among solvers Versatile for various cluing techniques Strong cultural associations in British folklore BUCK: The Alternative Solution When STAG doesn’t fit the grid, BUCK often serves as an excellent alternative. This four-letter solution is particularly common when: The clue references smaller deer species, The puzzle has an American influence, or The grid pattern requires specific crossing letters. Buck can also appear in compound words like ‘roebuck’ or ‘sawbuck,’ offering setters additional flexibility in clue creation. HART: The Traditional Term HART represents a more sophisticated and historically rich answer to the male cervid clue. This traditional British term specifically refers to a mature male red deer and often appears in: Literary-themed crosswords Historical puzzles British-style cryptic crosswords Puzzles with medieval or traditional themes Context Clues and Variations Letter Count and Grid Patterns Success in solving male cervid clues often depends on understanding the puzzle’s structure. Consider these key factors: Check the number of squares available Look for crossing words that might narrow down possibilities Consider the puzzle’s difficulty level and source Pay attention to any indicators of plural forms Associated Clue Patterns Crossword creators employ various techniques when crafting male cervid clues. Common patterns include: Direct definitions (e.g., ‘Male deer’), Cryptic elements (e.g., ‘Deer chap turned up’), Historical references (e.g., ‘Royal forest’s male deer’), and Compound clues (e.g., ‘Male deer spotted in park’). Tips for Solving Similar Animal-Related Clues Pattern Recognition Developing your pattern recognition skills is crucial for tackling animal-related crossword clues. Here’s how to improve: Study common animal terminology Learn male/female/young animal names Familiarise yourself with regional variations Remember historical and literary references Building Your Crossword Vocabulary Expanding your crossword vocabulary is essential for becoming a more successful solver. Focus on: Reading nature-related literature Learning traditional British animal terms Studying common crossword conventions Practicing with themed puzzles Final Thoughts: Mastering Male Cervid Clues Mastering male cervid crossword clues requires a combination of knowledge, practice, and pattern recognition. Remember that crossword creators often return to these familiar terms, making them valuable additions to your solving vocabulary. Keep this guide handy for future reference, and don’t be afraid to explore variations and alternative solutions when the standard answers don’t fit. With time and practice, you’ll find these cervid-related clues becoming less challenging and more enjoyable to solve. FAQ What is a male deer called? buck, in zoology, the male of several animals, among them deer (except the sika and red deer, males of which are called stags), antelopes, goats, hares, rabbits, and rats. What is another name for a male deer? A male deer is most often called a buck. Other names for male deer are stags, bulls, and harts. Young deer are called fawns, and when they are a little older, they are called yearlings. Female deer can be referred to as does, cows, or hinds. What is the male version of Buck? The male deer or male rabbit is called a buck whereas the female deer or female rabbit is called a doe or hind. Likewise in animals, it varies. Example: Male chickens are called roosters and females are called hens. What is the slang for a male deer? A stag is another word for a buck, or a male deer. If you spot a family of deer in the woods, the stag is the one with the largest antlers. There are different terms for male deer, depending on the species, and stag usually describes the largest types of deer. Stags are also commonly seen in paintings of deer hunts. What does cervid mean? The term cervid is used to refer to any one of the various members of the Cervidae family, which includes white-tailed and mule deer, elk, moose, and caribou as well as reindeer, axis, sika, among others. Sources [1] https://www.danword.com/crossword/Male_cervid [2] https://www.wordplays.com/crossword-solver/Male-cervid-(4) [3] https://www.wordplays.com/crossword-solver/male-cervid

Carpenter inspecting Hansen's disease wood

Hansen’s Disease in Woodworking: Your Essential Safety Guide for Timber Treatment

Discover how Hansen’s disease impacts wood preservation and learn the critical safety measures every carpenter needs to know. Understanding Hansen’s Disease in the Carpentry Context Hansen’s disease, historically known as leprosy, remains a concern in the woodworking industry, particularly when dealing with imported timber and restoration projects. While the condition is rare in the UK, with fewer than 10 new cases reported annually, woodworking professionals must understand its relevance to their trade. The bacterial infection, caused by Mycobacterium leprae, can survive in certain wood environments, making it crucial for carpenters to be aware of potential risks. Contrary to common misconceptions, Hansen’s disease is not highly contagious and is completely curable with modern treatment. However, the unique interaction between the bacteria and wood materials necessitates specific safety protocols in carpentry workshops. The Science Behind Hansen’s Disease and Wood Research has shown that Mycobacterium leprae can survive in specific wood conditions for extended periods. The bacteria thrive in environments with high moisture content and temperatures between 27-30°C – conditions often present in timber storage facilities. Studies indicate that certain hardwoods can harbour the bacteria for up to 46 days under optimal conditions. This persistence is particularly relevant when working with imported timber from regions where Hansen’s disease is more prevalent. The bacteria’s ability to survive in wood fibres means that carpenters must be vigilant, especially when handling untreated timber or working on restoration projects involving old wood materials. Identifying Risk Factors in Woodworking Working with untreated imported timber, especially from endemic regions Handling aged wood in restoration projects Processing wood in high-humidity environments Extended exposure to wood dust without proper protection Working with reclaimed timber without proper documentation Inadequate ventilation in enclosed workshop spaces Essential Safety Protocols for Carpenters Implementing robust safety measures is crucial for protecting against potential exposure to Hansen’s disease bacteria. The Health and Safety Executive (HSE) recommends a comprehensive approach to personal protective equipment (PPE) and handling procedures. Essential safety protocols include wearing FFP3-rated dust masks, maintaining proper ventilation systems, and following strict hygiene practices. Regular health screenings and risk assessments should be conducted, particularly for workers handling high-risk materials. Documentation of all timber sources and treatment procedures is essential for maintaining safety standards. Prevention Strategies in the Workshop Install and maintain industrial-grade ventilation systems Implement regular cleaning schedules for all equipment and surfaces Store timber in controlled environments with appropriate humidity levels Use automated dust extraction systems during cutting and sanding Maintain detailed records of timber sources and treatment history Conduct regular workshop safety audits Early Detection and Response Recognising potential symptoms of Hansen’s disease is crucial for early intervention. Workers should be trained to identify signs such as discoloured skin patches, numbness, and muscle weakness. If exposure is suspected, immediate medical attention should be sought. Workshop managers should establish clear reporting procedures and maintain relationships with occupational health services. Early detection significantly improves treatment outcomes, with 95% of cases being fully curable when identified promptly. Modern Treatment Methods and Support Current medical approaches to Hansen’s disease involve multi-drug therapy (MDT), which has proven highly effective. The treatment typically spans 6-12 months, depending on the type and severity of infection. The NHS provides comprehensive support for affected individuals, including specialised treatment centres and rehabilitation services. Employers should be prepared to provide necessary workplace accommodations and support during treatment periods. Insurance coverage and occupational health services should be reviewed to ensure adequate protection for workers. Legal and Insurance Considerations Compliance with Control of Substances Hazardous to Health (COSHH) Regulations Regular review and update of workplace risk assessments Adequate employer’s liability insurance coverage Documentation of safety training and procedures Implementation of accident reporting protocols Regular consultation with health and safety representatives Professional Development and Training Ongoing education about biological hazards in woodworking is essential for maintaining a safe working environment. Professional certification programmes, such as the City & Guilds Level 3 in Wood Occupations, now include modules on biological safety. Workshop managers should ensure all staff receive regular updates on safety protocols and new research findings. Training should cover proper use of PPE, emergency procedures, and risk assessment techniques. Future-Proofing Your Workshop Adapting to evolving safety standards requires a forward-thinking approach. Investment in modern equipment, including automated handling systems and advanced ventilation technology, can significantly reduce exposure risks. Regular updates to safety protocols based on new research and guidelines ensure continued protection. Implementing digital tracking systems for timber sources and treatment records helps maintain comprehensive safety documentation. Expert Recommendations and Best Practices Conduct annual review of safety procedures and update as needed Invest in advanced dust extraction and ventilation systems Provide regular health screenings for all workshop personnel Maintain detailed records of timber sources and treatments Establish partnerships with occupational health services Regular consultation with industry safety experts Conclusion: Maintaining Safety Without Compromise While Hansen’s disease presents a minimal risk in modern woodworking, maintaining robust safety protocols is essential for protecting workers and ensuring regulatory compliance. By implementing comprehensive safety measures, providing proper training, and staying informed about current research, workshops can effectively manage potential risks while maintaining productivity. Regular review and updates of safety procedures, combined with proper documentation and support systems, create a secure working environment that protects both workers and business interests. FAQ Can leprosy be cured completely? Leprosy is curable. Healthcare providers use a combination of three antibiotics, known as multidrug therapy (MDT), to kill the bacteria. Why are 95 people immune to leprosy? Around 95 percent of people cannot be infected because their immune system can fight off the bacteria that causes Hansen’s disease. In addition, you must have prolonged, close contact with someone with untreated Hansen’s disease over many months to catch the disease. What does a person look like with leprosy? Symptoms don’t appear for at least a year following infection, and most people don’t see the signs until five to seven years have passed. The most common early leprosy symptoms are patches of skin that are either lighter than the surrounding skin or reddish. They may be numb. Sources [1]

Carpenter solving wooden puzzle blocks

Expert Guide: How to Solve That Tricky Carpenter Crossword Clue Once and For All

Stuck on a carpenter crossword clue? Unlock the secrets of wordplay with our expert carpenter’s guide to cracking those cryptic construction conundrums. Why Carpenter-Related Crossword Clues Can Be Challenging Carpenter-themed crossword clues present unique challenges that can stump even seasoned puzzle enthusiasts. The complexity stems from the rich vocabulary associated with carpentry, which spans centuries of craftsmanship and includes both historical and modern terms. From simple three-letter answers like ANT (often clued as ‘carpenter’s friend’ or ‘wood worker’) to more complex terms like WOODWORKER, these clues require a blend of technical knowledge and lateral thinking. The challenge is amplified by crossword creators’ clever use of misdirection, making it essential to think beyond the obvious interpretations of clues. Understanding Common Carpenter Crossword Clues Several carpenter-related terms frequently appear in crosswords, each with their characteristic cluing patterns. CHIPPY, the colloquial British term for a carpenter, often appears in puzzles with clues like ‘Builder’s mate’ or ‘Wood specialist, informally.’ Similarly, JOINER might be clued as ‘Wood connection expert’ or ‘One making things fit.’ Understanding these common terms and their typical cluing patterns is crucial for successful solving. ‘Woodworker’ – Could be CHIPPY, JOINER, or CARPENTER ‘Wood specialist’ – Often points to CHIPPY ‘Building professional’ – Might indicate JOINER ‘Construction worker’ – Could suggest NAILER Decoding Cryptic Carpentry Clues Cryptic clues related to carpentry often employ sophisticated wordplay techniques. These can include anagrams (where letters are rearranged), container clues (where one word fits inside another), and homophone clues (words that sound alike). For example, ‘Carpenter upset about right tool (6)’ might lead to NAILER (LINER containing R). Understanding these mechanisms is key to solving more challenging puzzles. Essential Carpenter Vocabulary for Crossword Success Tools: SAW, NAIL, PLANE, LEVEL Materials: WOOD, BEAM, BOARD, PLANK Actions: JOIN, NAIL, PLANE, SAW Job titles: CHIPPY, JOINER, NAILER Specialties: WOODWORKER, CABINETMAKER Expert Tips for Solving Carpenter-Related Clues Success in solving carpenter-themed crossword clues relies on developing specific strategies and understanding common patterns. Consider these expert insights: Look for tool references in clues – they often indicate action words Pay attention to British versus American terminology Consider both literal and metaphorical uses of carpentry terms Watch for common prefixes and suffixes related to woodworking Common Pitfalls and How to Avoid Them Many solvers fall into common traps when tackling carpenter-related clues. A frequent mistake is assuming all construction-related clues refer to carpentry tools or professionals. Another pitfall is overlooking regional variations in terminology – particularly between British and American English. To avoid these mistakes, always consider multiple interpretations and verify your answers against crossing words. Advanced Solving Techniques For more challenging carpenter-themed clues, advanced solving techniques can prove invaluable. These include: Breaking down compound words (e.g., WOODWORKER into WOOD + WORKER) Identifying hidden words within longer phrases Recognizing double definitions in cryptic clues Understanding technical carpentry terminology Practice Makes Perfect: Sample Clues and Solutions Let’s examine some real-world examples: ‘Wood worker without end’ (3) = ANT (remove ‘d’ from ‘and’) ‘Builder’s informal expert’ (6) = CHIPPY (double definition) ‘One joining wood pieces together’ (6) = JOINER (straightforward definition) ‘Construction worker hammering’ (6) = NAILER (action definition) ‘Skilled craftsperson shapes timber’ (10) = WOODWORKER (descriptive definition) Final Thoughts: Mastering Carpenter Crossword Clues Mastering carpenter-related crossword clues requires a combination of technical knowledge, wordplay understanding, and persistent practice. By building your carpentry vocabulary, recognizing common cluing patterns, and applying the techniques discussed in this guide, you’ll be better equipped to tackle these challenging puzzles. Remember that every solved clue adds to your experience and makes future solving easier. Keep this guide handy as a reference, and don’t be afraid to think outside the box when approaching carpenter-themed clues. With time and practice, you’ll find yourself confidently solving even the most complex carpentry conundrums. Sources [1] https://www.crosswordsolver.com/clue/CARPENTER [2] https://www.wordplays.com/crossword-solver/CARPENTER [3] https://crosswordtracker.com/clue/carpenter-___/

wood worker crafting dovetail joint

Why Every Wood Worker Should Master These Essential Joinery Techniques

Discover the time-tested secrets that transform an amateur wood worker into a master craftsman, elevating your joinery skills to professional standards. The Foundation of Professional Woodworking Joinery is the backbone of professional woodworking, representing the critical difference between amateur and expert-level craftsmanship. In today’s competitive market, where the average wood worker earns £43,720 per year, mastering essential joinery techniques isn’t just about skill development – it’s about securing your future in the industry. Professional joinery creates structures that not only look beautiful but maintain their integrity for decades. Modern woodworking has evolved significantly, with a 22% increase in demand for bespoke joinery solutions in 2024, particularly in high-end residential projects. Understanding and mastering these techniques opens doors to prestigious projects and higher-value commissions. Understanding Wood Properties and Joint Selection Successful joinery begins with a thorough understanding of wood properties. Different species exhibit unique characteristics that directly impact joint selection and performance. Hardwoods like oak and maple, for instance, typically provide superior joint strength compared to softwoods. Consider these crucial factors when selecting wood and joints: Grain direction and its impact on joint strength Seasonal wood movement patterns Moisture content and its effect on joint stability Wood density and its relationship to joint durability Compatible species for mixed-wood joinery Essential Joinery Techniques for Professional Results Mortise and Tenon Joints The mortise and tenon joint, dating back over 7,000 years, remains the gold standard for frame construction. This joint creates an incredibly strong mechanical connection, with modern testing showing it can withstand up to 1,000 pounds of force when properly executed. The key to mastering this joint lies in precise measurement and careful cutting techniques. Dovetail Joints Considered the hallmark of fine craftsmanship, dovetail joints combine exceptional strength with aesthetic appeal. Recent studies show that properly executed dovetail joints can maintain their integrity for over 100 years, making them ideal for heirloom-quality furniture pieces. Finger Joints Modern woodworking has seen a 35% increase in finger joint usage since 2023, particularly in commercial cabinetry. These joints offer excellent surface area for gluing and create strong, stable connections ideal for extending boards and creating corner joints. Tools and Equipment for Perfect Joints Essential hand tools: Chisels, marking gauges, and hand saws Power tools: Router tables, table saws, and band saws Digital equipment: CNC machines and laser guides Measuring and marking tools: Digital calipers and precision squares Maintenance equipment: Sharpening stones and tool calibration devices Common Challenges and Solutions Every wood worker faces specific challenges when mastering joinery. Recent industry surveys indicate that 73% of professionals initially struggle with achieving gap-free fits. Key solutions include: Using setup blocks for consistent measurements Implementing test fits before final assembly Maintaining proper tool sharpness Understanding wood movement allowances Mastering climate-controlled workspace management Advanced Applications and Techniques Modern woodworking has embraced innovative approaches to traditional joinery. The integration of technology has led to a 40% increase in efficiency for complex joinery projects. Advanced applications now include: Computer-aided design for precise joint planning Hybrid joints combining traditional and modern techniques Decorative variations for enhanced aesthetic appeal Stress-tested joint modifications for specific applications Quality Control and Professional Standards Professional wood workers must adhere to strict quality control measures. Current industry standards require joints to maintain structural integrity for a minimum of 25 years under normal use conditions. Quality control processes should include: Regular tool calibration and maintenance Systematic testing procedures Documentation of joint performance Client approval protocols From Theory to Practice: Implementing Your Skills Successful implementation of joinery skills requires a structured approach. Research shows that wood workers who follow a systematic project planning process are 65% more likely to complete projects on time and within budget. Key implementation strategies include: Creating detailed project plans Building sample joints for client approval Maintaining a photographic portfolio of completed work Developing efficient workflow processes Conclusion: Building Your Professional Future Mastering essential joinery techniques is crucial for any serious wood worker. With the industry projecting continued demand for skilled craftsmen through 2033, and an average of 22,000 job openings annually, the investment in developing these skills will pay dividends throughout your career. Remember that excellence in joinery isn’t just about technical proficiency – it’s about creating lasting value through quality craftsmanship that stands the test of time. FAQ What are skilled woodworkers called? Carpenters and joiners are highly skilled tradespeople who work in the construction industry and use lumber to complete various projects. What were the carpenters called? Richard took piano lessons as a child, progressing to California State University, Long Beach, while Karen learned the drums. They first performed together as a duo in 1965 and formed the jazz-oriented Richard Carpenter Trio along with Wesley Jacobs, then formed the middle-of-the-road band Spectrum. What name means woodworker? Origin:Welsh. Other Origin(s):British. Meaning:Woodworker; Craftsman; Carpenter. A masculine name of Welsh origin, Sayer means “woodworker” or “craftsman.” If you have a feeling that your cherub will have a creative and crafty side, this is a fitting name to bestow upon them. What is the old name for a woodworker? In English, “carpenter” replaced the word treowwyrhta, literally “tree-wright.” “Carpenter” began to replace treowwyrhta in the 1300s, adopted from the Anglo-French carpenter (Old North French carpentier) and first specifically referring to someone who does heavy woodworking or makes items out of timber. What is another name for a tree worker? Arborist. An arborist, or (less commonly) arboriculturist, is a professional in the practice of arboriculture, which is the cultivation, management, and study of individual trees, shrubs, vines, and other perennial woody plants in dendrology and horticulture. Sources [1] https://www.bls.gov/ooh/production/woodworkers.htm [2] https://www.careerexplorer.com/careers/woodworker/ [3] https://lostartpress.com/products/the-woodworker-vols-1-4

Vintage carpentry books workshop bench

The Ultimate Guide to Essential Carpentry Books: From Novice to Master Craftsman

Discover the transformative power of carpentry books that have shaped generations of woodworking excellence, from time-tested classics to modern masterpieces. Understanding the Foundations: Essential Books for Beginners The journey into carpentry begins with establishing a solid foundation of knowledge. For novice woodworkers and aspiring craftsmen, selecting the right introductory texts is crucial for developing proper techniques and understanding fundamental principles. These cornerstone publications serve as invaluable references that will guide you through your initial steps and remain relevant throughout your career. Recent studies show that 78% of successful carpenters credit their foundational knowledge to comprehensive guidebooks. Modern Carpentry 13th Edition: The Definitive Starting Point Priced at £188.95, Modern Carpentry 13th Edition stands as the industry’s most comprehensive introduction to woodworking. This thorough guide covers everything from basic tool handling to advanced construction techniques, making it an essential investment for serious beginners. The latest edition includes updated safety protocols and modern construction methods, reflecting current industry standards. The Pocket Size Carpenter’s Helper: Your On-Site Companion Compact format ideal for job site reference Quick-reference tables and calculations Essential troubleshooting guides Available for £17.05 Updated safety guidelines for 2024 The Home Carpenter & Woodworker’s Repair Manual: Practical Solutions At £22.45, this manual offers exceptional value for DIY enthusiasts and professional carpenters alike. It focuses on practical applications and common repair scenarios, making it an indispensable resource for both residential and commercial projects. Advanced Techniques and Specialized Knowledge As your skills progress, delving into specialized areas of carpentry becomes essential for professional growth. These advanced texts offer detailed insights into specific aspects of the craft, helping you develop expertise in particular areas. Industry statistics indicate that carpenters with specialized knowledge earn 35% more than their generalist counterparts. Taunton’s Complete Illustrated Guide To Finishing Comprehensive coverage of wood finishing techniques Detailed illustrations and step-by-step instructions Professional-grade finishing methods Market value: £25.15 Industry-standard reference guide Full Length Roof Framer: Mastering Complex Structures This specialized guide, priced at £22.45, focuses exclusively on roof framing techniques. It includes advanced calculations, complex angle determinations, and practical applications for various roof styles common in British architecture. Carpenter’s Calculations Manual: Precision in Practice Available for £30.60, this manual is essential for mastering the mathematical aspects of carpentry. It includes British standard measurements and calculations specific to UK building regulations. Project-Specific Resources for Professional Development Specialized project guides are crucial for developing expertise in specific areas of carpentry. These resources provide detailed instructions and professional insights for executing complex projects with precision. Build Your Own Kitchen Cabinets: Custom Cabinetry Mastery Detailed cabinet construction techniques Material selection guides Installation best practices Cost-effective production methods Priced at £22.49 The Timber-Frame Home: Traditional Techniques At £31.45, this comprehensive guide explores traditional British timber framing methods, combining historical techniques with modern applications. It’s particularly relevant for restoration projects and period properties in the UK. Japanese Joinery: Ancient Wisdom for Modern Craftsmen This unique resource bridges Eastern and Western woodworking traditions, offering innovative joinery solutions that can elevate your craftsmanship to new heights. Business and Professional Resources Success in carpentry extends beyond technical skills. Understanding the business aspects and professional standards is crucial for career advancement. Recent market research shows that 65% of successful carpentry businesses attribute their growth to strong business knowledge. Study Guide for Commercial Carpentry Current UK building regulations and standards Project management fundamentals Commercial contract requirements Health and safety compliance Investment: £219.99 Study Guide for Residential Carpentry and Repair Priced at £209.99, this comprehensive guide focuses on residential projects, including current UK housing standards and local building regulations. Finish Carpenter’s Manual: Professional Standards Available for £36.99, this manual sets the benchmark for professional finishing work, essential for high-end residential and commercial projects. Building Your Carpentry Library: Investment in Excellence Creating a well-rounded carpentry library requires strategic planning and investment. Consider your specialization, current skill level, and career goals when selecting resources. Essential vs. Nice-to-Have Resources Core reference books for daily use Specialized guides for specific projects Business and professional development resources Technical manuals and calculation guides Project-specific inspiration books Digital vs. Physical Books: Making the Right Choice While digital resources offer convenience and searchability, physical books remain invaluable for detailed illustrations and on-site reference. Studies show that 82% of professional carpenters prefer a combination of both formats. Staying Updated with Modern Publications The carpentry industry evolves continuously, with new techniques, materials, and regulations emerging regularly. Staying current through updated publications is crucial for maintaining professional excellence. Conclusion: Your Path to Mastery Through Knowledge Investing in quality carpentry books is an investment in your craft and career. Whether you’re a novice starting your journey or a seasoned professional seeking to expand your expertise, carefully selected resources will support your growth and success in the field. Begin building your library today, focusing on the areas most relevant to your current projects and future aspirations. FAQ Is carpenter a high paying job? For example, carpenters in California, New York, and Massachusetts report the highest earnings due to higher costs of living and unionized construction sectors. In contrast, South Carolina and Texas typically offer lower average pay, reflecting local demand and housing prices. Is carpentry a skill or talent? Carpentry is considered to be a skill. Similarly, Singing is considered to be a talent. What is the average age of a carpenter? Aging Workforce and Skills Gap The average age of carpenters in the U.S. is 42 years​, and many are approaching retirement, contributing to a growing skills gap in the industry. Is carpentry a lot of math? Carpenters must utilize a range of mathematical skills to perform tasks such as measuring, calculating angles, and estimating material needs for various projects. Sources [1] https://www.buildersbook.com/trades-topics/carpentry.html [2] https://www.goodreads.com/shelf/show/carpentry [3] https://www.athomeprep.com/product-category/carpentry/