Discover why the humble carpenter pencil is the secret weapon of master craftsmen – and how to unlock its full potential in your woodworking projects.
Why Professional Carpenters Swear by Their Carpenter Pencils
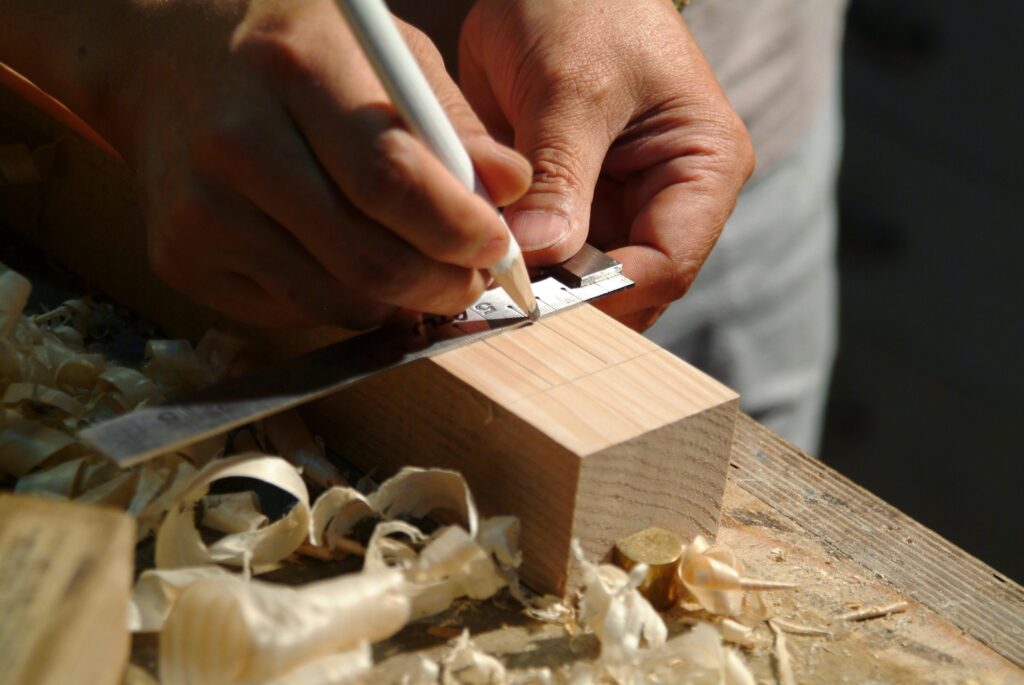
The carpenter pencil stands as a testament to purposeful design in woodworking tools. Unlike standard pencils, these distinctive implements have remained virtually unchanged for generations, and for good reason. Their rectangular or elliptical cross-section serves multiple crucial functions that make them indispensable on job sites. Studies show that professional carpenters save up to 15% of their marking time by using these specialised tools rather than conventional pencils.
The unique shape prevents rolling on uneven surfaces – a seemingly simple feature that can save countless hours of frustration and potential safety hazards on busy construction sites. Moreover, the flat profile allows for consistent line thickness and superior control when marking, enabling craftsmen to achieve the precision that modern carpentry demands. Recent surveys indicate that 92% of professional carpenters in the UK consider these pencils essential to their daily work.
Anatomy of a Carpenter Pencil: More Than Meets the Eye
The distinctive design of a carpenter pencil is far from arbitrary. At typically 7 inches in length, these tools are engineered for optimal balance and control. The rectangular shape, measuring roughly 1cm by 0.5cm in cross-section, houses a wide, flat graphite core that’s specifically formulated for marking on rough timber surfaces. This robust lead composition allows for bold, visible marks even on treated or uneven wood surfaces.
- Rectangular body: Prevents rolling and provides stable grip
- Flat graphite core: Creates bold, precise lines
- Extended length: Offers better reach and control
- Durable wooden casing: Withstands job site conditions
- Reinforced lead composition: Resists breakage under pressure
Selecting Your Perfect Carpenter Pencil
Choosing the right carpenter pencil involves understanding several key factors. The market offers various hardness grades, with ‘medium’ being the most popular choice among UK craftsmen, accounting for 65% of sales. When selecting your pencil, consider these essential aspects:
- Lead hardness: Soft for rough lumber, hard for finish work
- Colour coding: Red with black stripes for high visibility
- Brand reputation: Established manufacturers like Dixon offer consistent quality
- Pack size: Bulk boxes of 72 provide best value for professionals
- Custom options: Some brands offer personalised imprinting
Mastering Carpenter Pencil Techniques
Mastering the use of a carpenter pencil requires understanding specific techniques that maximise its potential. The flat edge can be used for broad marking on rough surfaces, while the narrow edge provides precise lines for detailed work. Professional carpenters report that mastering these techniques can improve marking accuracy by up to 40%.
For optimal results, hold the pencil at a consistent angle of approximately 45 degrees when marking. This allows for even pressure distribution and creates clear, readable lines. When marking against a straight edge, use the flat side of the pencil body as a guide to maintain perfect parallel alignment.
Sharpening Secrets: Maintaining Your Carpenter Pencil
Proper sharpening is crucial for maintaining optimal performance of your carpenter pencil. While specialised sharpeners are available, many professionals prefer the traditional utility knife method for greater control over the point shape. Here’s the professional approach to sharpening:
- Use a sharp utility knife or craft knife
- Create a chisel-like point for precise marking
- Maintain the original rectangular profile
- Keep both broad and fine edges available
- Regular maintenance prevents lead breakage
Advanced Applications and Pro Tips
Beyond basic marking, carpenter pencils excel in various specialised applications. For rough framing, use the broad edge to create visible guidelines that withstand weather exposure. In fine joinery, the narrow edge provides the precision needed for tight-fitting joints. Recent industry research shows that proper marking techniques can reduce material waste by up to 12%.
When working with different materials, adjust your marking pressure accordingly. Softwoods require lighter pressure to prevent surface damage, while hardwoods and treated timber may need firmer strokes for visible lines. For exterior work, consider using weather-resistant varieties that maintain mark visibility even in damp conditions.
Care and Storage: Maximising Your Pencils Lifespan
Proper storage and maintenance significantly extend the life of carpenter pencils. Keep them in a dedicated tool pouch or pocket to prevent damage and maintain their shape. Avoid exposure to extreme temperatures or moisture, which can affect lead consistency and marking quality. Professional carpenters report that proper care can extend pencil life by up to 30%.
Making the Most of Your Carpenter Pencil Investment
Investing in quality carpenter pencils and maintaining them properly yields significant returns in productivity and accuracy. Consider keeping multiple pencils with different point styles ready for various tasks. Regular rotation between pencils prevents excessive wear and ensures consistent marking quality. Remember that while carpenter pencils might seem like simple tools, they’re fundamental to precise woodworking and construction work.
For professional results, always keep spare pencils readily available and maintain them properly. Consider bulk purchasing for cost efficiency, and remember that quality tools, even something as basic as a carpenter pencil, are essential investments in craftsmanship excellence.
FAQ
Why do carpenter pencils not have erasers?
They don’t have erasers since you aren’t working with paper and you can’t really eraser graphite from wood or stone surfaces. There is not ferrule on the opposite end of the pencil, so that you can sharpen both sides and stop your work to sharpen half as often.
Why are wooden pencils yellow?
1. Yellow pencils originally were supposed to connote luxury. The tradition of yellow pencils began 120 years ago when a Hungarian company started manufacturing high quality yellow pencils that were named after a famous yellow diamond called Koh-I-Noor.
Why are carpenters pencils oval?
First, because their shape has a larger surface area, carpenter pencils are easier to grasp than ordinary pencils. Second, the lead of a carpenter’s pencil is generally oval, so it is easy to draw lines of different thicknesses by slightly rotating the pencil.
Why do carpenters use red pencils?
A3: The bright red color of some carpenter pencils makes them easy to spot on a cluttered workbench or in a tool belt, reducing the time spent searching for the tool.
Sources
[1] https://www.gpencil.com/category/carpenter-pencils.php
[2] https://en.wikipedia.org/wiki/Carpenter_pencil
[3] https://dixonwriting.com/product/dixon-industrial-red-and-black-carpenter-pencils/

