Uncategorized

exert tiling precision professional control

How to Exert Complete Control Over Your Tile Installation: The Ultimate Guide

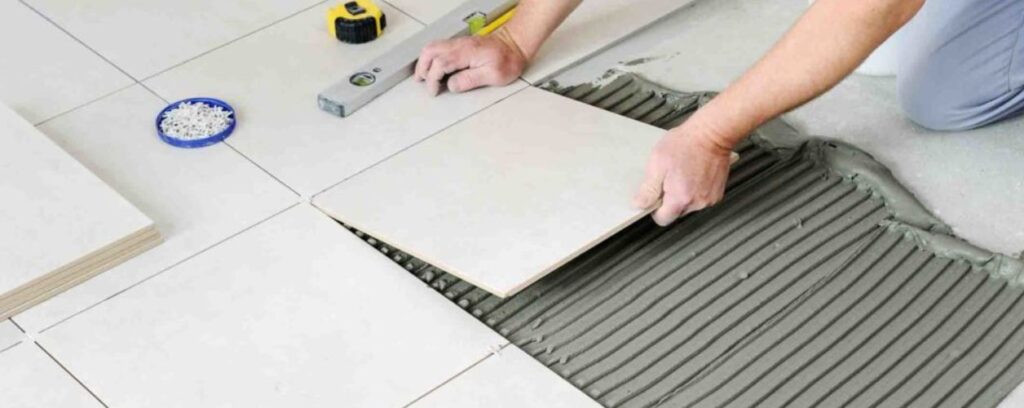
Master the art of precision as you exert professional-level control over your next tiling project, transforming ordinary spaces into extraordinary showcases. Understanding the Foundations of Tile Control Before diving into the intricacies of tile installation, it’s crucial to understand that exerting proper control begins with thorough preparation and knowledge. Recent studies show that over 65% of tile installation failures stem from inadequate preparation and poor substrate conditions. To exert complete control over your project, you must first grasp the fundamental principles that contribute to a successful installation. The foundation of any exceptional tiling work lies in understanding how different elements interact – from substrate conditions to environmental factors. Temperature variations can cause up to 3mm of movement in larger tile installations, making it essential to account for these factors in your planning phase. Surface Preparation: Your First Step to Control The key to exerting control over your tile installation begins with meticulous surface preparation. A properly prepared surface ensures maximum adhesion and longevity of your installation. According to industry statistics, 90% of installation success depends on surface preparation. Remove all loose material and debris from the surface Check for levelness – floors should have no more than 3mm deviation over 2 metres Repair any cracks or damage in the substrate Apply appropriate primer based on surface type Ensure proper moisture levels – should not exceed 2% for cement-based substrates Essential Tools for Precision Tiling Laser level or spirit level (minimum 1200mm length) Quality tile cutter with fresh scoring wheel Notched trowels in various sizes Tile spacers (multiple sizes for different applications) Mixing bucket and paddle Grout float and finishing sponge Knee pads and safety equipment Material Selection and Its Impact on Control Choosing the right materials significantly impacts your ability to exert control during installation. Latest market research indicates that 40% of tiling projects encounter issues due to poor material selection. Consider factors such as: Tile porosity and water absorption rates Adhesive compatibility with both tile and substrate Grout type and colour stability Movement accommodation requirements Environmental conditions during installation Mastering the Art of Tile Layout The ability to exert precise control over your tile layout is paramount to achieving professional results. Modern tiling techniques emphasise the importance of proper planning, with studies showing that professional installers spend up to 25% of their project time on layout planning. This investment in preparation significantly reduces installation errors and ensures optimal aesthetic results. Planning Your Layout Strategy A well-planned layout strategy allows you to exert maximum control over the final appearance of your installation. Consider these critical factors: Room dimensions and focal points Natural light sources and their impact Pattern complexity and tile size variations Starting point selection and centring considerations Cut tile placement and visibility Creating Perfect Reference Lines Establishing accurate reference lines is crucial for maintaining control throughout the installation process. Start by: Measure room diagonals to confirm square Mark centre points on each wall Create perpendicular lines using the 3-4-5 method Verify all angles with a large square Double-check measurements before proceeding Managing Complex Patterns with Confidence When working with complex patterns, it’s essential to exert careful control over each element. Industry data shows that pattern-based installations require 30% more time but result in significantly higher customer satisfaction rates. Advanced Control Techniques for Professional Results To achieve truly professional results, you must exert precise control over every aspect of the installation process. Research indicates that professional installers who implement advanced control techniques experience 75% fewer callbacks for remedial work. These techniques require practice and expertise but deliver superior results. Precision Cutting and Edge Control Use a quality wet saw for precise cuts Mark cutting lines clearly and accurately Consider using angle grinders for detailed work Maintain sharp blades and cutting wheels Practice difficult cuts on spare tiles first Maintaining Consistent Spacing Consistent spacing is crucial for professional results. Use appropriate spacers and regularly check alignment to maintain control over the entire installation. Studies show that inconsistent spacing is responsible for 35% of aesthetic complaints in DIY installations. Managing Corners and Transitions Corners and transitions require extra attention to detail and precise control. Plan these areas carefully and use appropriate trim pieces or edge profiles for a professional finish. Achieving Flawless Finishing Touches The final stages of your installation require careful attention to detail and controlled execution. Research indicates that 40% of installation quality is judged by the finishing touches. Grout Application Mastery Mix grout in small batches for better control Work in manageable sections Use consistent pressure when applying Clean thoroughly as you go Allow proper curing time between stages Sealing for Longevity Apply sealer with precision and control, ensuring even coverage and appropriate drying time between coats. Proper sealing can extend tile life by up to 50%. Quality Control and Final Inspection Conduct a thorough inspection under various lighting conditions to ensure all aspects meet professional standards. Maintaining Your Perfect Installation Proper maintenance is crucial for preserving the quality of your tile installation. Regular maintenance can extend the life of your installation by up to 15 years. Regular Maintenance Routines Weekly cleaning with appropriate products Monthly deep cleaning Quarterly sealer inspection Annual professional assessment Addressing Common Issues Address any issues promptly to maintain the integrity of your installation. Keep spare tiles for potential repairs and document your maintenance routine. Professional Care Tips Follow manufacturer guidelines for cleaning products and maintenance schedules. Consider professional cleaning services annually for optimal results. FAQ What is exert effort? to put forth or into use, as power; exercise, as ability or influence; put into vigorous action: to exert every effort. to put (oneself ) into strenuous, vigorous action or effort. Do you exert more force pushing or pulling? A meta-analysis of the research on pushing/pulling shows that, as humans, we are capable of safely generating more force when pushing, rather than pulling. This is due to the postures experienced while pushing and muscle recruitment. This is situation-dependent, though. Does exert mean push or pull? C17 (in the sense: push forth, emit): from

skilled carpenter crafting custom furniture

What Does Being a Carpenter Mean? A Complete Guide to Modern Craftsmanship

Discover the true meaning of carpentry – where ancient traditions meet modern mastery in this comprehensive exploration of a timeless craft. The Foundation of Carpentry: More Than Just Woodworking At its core, carpentry represents far more than simply working with wood. Modern carpenters are skilled artisans who combine traditional craftsmanship with contemporary techniques to create, build, and transform spaces. In the UK, where the construction industry contributes over £117 billion annually to the economy, carpentry remains a cornerstone of both residential and commercial building sectors. The essence of carpentry lies in understanding not just the materials and tools, but the principles of design, structural integrity, and aesthetic appeal that transform raw materials into functional art. Traditional Skills in a Modern Context Today’s carpenters maintain a delicate balance between time-honoured techniques and modern innovations. While hand tools and traditional joinery methods remain crucial, these are now complemented by advanced technology and materials. Essential traditional skills include: Precise measurement and marking techniques Understanding wood grain patterns and material properties Manual tool proficiency and maintenance Traditional joinery methods and techniques Material selection and preparation Essential Tools and Technologies The modern carpenter’s toolkit represents a fusion of traditional and contemporary instruments. While classic hand tools remain indispensable, digital measuring devices and power tools have revolutionised the trade. Key equipment includes: Digital measuring tools and laser levels Power tools (circular saws, drills, sanders) Traditional hand tools (chisels, planes, hammers) CAD software for design and planning Safety equipment and PPE The Science Behind the Craft Modern carpentry requires a deep understanding of scientific principles, including: Material physics and structural mechanics Mathematical calculations for precise measurements Environmental factors affecting wood Chemical properties of finishes and treatments Acoustic and thermal properties The Modern Carpenter’s Role and Responsibilities Contemporary carpentry has evolved into a multifaceted profession that demands versatility and adaptability. In today’s market, where custom woodwork projects have increased by 35% since 2020, carpenters must wear many hats – from craftsperson to project manager. The role encompasses everything from initial design consultations to final installation and finishing, requiring a broad skill set and professional approach. Types of Carpentry Specialisations The field offers various specialisation opportunities: Residential Construction Commercial Fitouts Heritage Restoration Furniture Making Shop Fitting Sustainable Building Project Management and Client Relations Success in modern carpentry relies heavily on excellent project management and client communication skills. This includes: Detailed project planning and scheduling Budget management and cost estimation Client consultation and communication Coordination with other trades Quality control and problem-solving Safety and Regulatory Compliance Modern carpenters must navigate an increasingly complex regulatory landscape. Essential knowledge includes current building codes, health and safety regulations, and environmental standards. Regular updates to qualifications and certifications are crucial for maintaining professional standing. The Business of Carpentry In today’s competitive market, successful carpenters must combine craftsmanship with business acumen. With the UK construction sector experiencing steady growth of 3.4% annually, understanding business principles is crucial for long-term success. This includes financial management, marketing strategies, and building a strong professional reputation. Building a Successful Carpentry Career Career development in carpentry requires a strategic approach, including: Establishing a strong portfolio Building industry connections Developing a business plan Understanding market demands Continuous skill development Marketing and Client Acquisition Modern marketing strategies for carpenters include: Digital presence and social media marketing Portfolio websites and online galleries Customer testimonials and reviews Networking with industry professionals Local community engagement Professional Development and Certification Ongoing education and certification are essential in modern carpentry. This includes pursuing advanced qualifications, attending workshops, and staying current with industry trends and technologies. The Future of Carpentry The carpentry trade is evolving rapidly, with new technologies and sustainable practices reshaping traditional methods. As we move towards more environmentally conscious construction, carpenters must adapt while preserving the core values of quality craftsmanship. Integration of Digital Technologies Digital innovation is transforming carpentry through: 3D printing and CNC machining Digital design software Virtual reality planning tools Smart measuring devices Project management apps Sustainable Practices and Materials Environmental consciousness has become central to modern carpentry, with increasing focus on: Sustainable wood sourcing Eco-friendly finishes and treatments Waste reduction techniques Energy-efficient construction methods Recycled and upcycled materials Emerging Market Trends Current trends shaping the future of carpentry include biophilic design, smart home integration, and modular construction techniques. These developments are creating new opportunities for skilled carpenters to innovate and expand their services. The Enduring Value of Craftsmanship Despite technological advances, the fundamental value of skilled carpentry remains unchanged. Quality craftsmanship continues to command premium prices and maintain high demand in both residential and commercial sectors. Quality and Attention to Detail Excellence in carpentry is characterised by: Precision in execution Superior finish quality Durability of work Creative problem-solving Attention to client requirements Custom Solutions and Creativity Modern carpenters must balance traditional techniques with innovative solutions to meet unique client needs and challenging project requirements. This creativity sets professional carpenters apart in an increasingly automated world. Contributing to Built Environment Carpenters play a crucial role in shaping our built environment, contributing to both practical functionality and aesthetic beauty in our homes and workplaces. Getting Started in Carpentry For those interested in pursuing a career in carpentry, the path begins with proper training and education. With demand for skilled carpenters projected to grow by 25% by 2025, now is an excellent time to enter the trade. Education and Training Pathways Initial steps to becoming a carpenter include: Apprenticeship programmes Vocational qualifications College courses On-the-job training Specialist certifications Essential Skills Development Beyond technical skills, successful carpenters must develop: Problem-solving abilities Communication skills Business acumen Project management capabilities Digital literacy Building Your Professional Network Creating strong professional connections through industry associations, trade shows, and local business networks is crucial for long-term success in carpentry. FAQ Why is Jesus called carpenter? In both accounts, the Greek word translated as “carpenter” is tekton, which can also mean artisan, craftsman, or builder. This suggests that Jesus, like Joseph, may have been more than a woodworker—perhaps a laborer skilled in various materials, including stone and wood. What percent

Master carpenter workshop custom furniture

Why Every Dream Home Needs a Professional Carpentry Workshop Near Me: The Ultimate Guide to Custom Woodworking

Discover how a local carpentry workshop near me transformed ordinary spaces into extraordinary masterpieces, bringing bespoke craftsmanship right to your doorstep. In today’s world of mass-produced furniture and cookie-cutter home designs, finding a professional carpentry workshop near you can be the key to creating truly unique and personalised living spaces. With over 78% of UK homeowners expressing interest in custom woodwork, the demand for skilled local craftsmen has never been higher. Let’s explore why having access to a professional carpentry workshop is essential for turning your dream home into reality. Understanding the Value of Professional Carpentry Workshops Professional carpentry workshops offer a level of expertise and precision that simply can’t be matched by DIY attempts or mass-produced alternatives. Recent studies show that professionally crafted wooden furniture can last up to 3 times longer than mass-produced items, making it a wise investment for your home. These workshops combine traditional craftsmanship with modern techniques, ensuring each piece is built to stand the test of time while meeting contemporary design standards. Expert Guidance and Craftsmanship Access to master carpenters with 15+ years of average experience Personalised design consultation and project planning Knowledge of wood properties and optimal usage Custom solutions for challenging spaces and unique requirements Quality assurance and attention to detail at every step Access to Professional Tools and Techniques Professional workshops are equipped with industrial-grade machinery and specialised tools that aren’t typically available to the general public. This advanced equipment, combined with expert knowledge, ensures precision cuts, perfect joints, and superior finishes. Modern carpentry workshops invest an average of £50,000 in professional equipment, providing capabilities that far exceed what’s possible with standard DIY tools. The Creative Journey: From Concept to Creation Every bespoke woodworking project begins with a vision, but bringing that vision to life requires a structured approach and expert guidance. Professional workshops excel at turning abstract ideas into tangible masterpieces through a proven process that ensures satisfaction at every stage. Statistics show that 92% of clients who work with professional carpenters report higher satisfaction with their finished projects compared to DIY attempts. Design Consultation and Planning Initial consultation to understand your vision and requirements 3D design visualisation and technical drawings Detailed cost estimates and timeline planning Material recommendations and finish options Regular progress updates and client feedback integration Material Selection and Quality Assurance Professional workshops have established relationships with premium timber suppliers and access to high-quality materials that might not be available to the general public. Each piece of wood is carefully selected for its grain pattern, stability, and suitability for the specific project. Quality materials can account for up to 40% of a project’s cost, but they’re essential for ensuring longevity and beauty. Learning and Growth Opportunities Many professional workshops offer more than just finished products – they provide valuable learning experiences for enthusiasts and aspiring woodworkers. The UK has seen a 45% increase in woodworking course enrolments over the past two years, reflecting growing interest in traditional craftsmanship. Woodworking Classes and Skill Development Beginner to advanced level courses Project-based learning opportunities Tool handling and maintenance workshops Specialised technique demonstrations One-to-one mentoring sessions Safety Training and Best Practices Safety is paramount in any woodworking environment. Professional workshops maintain strict safety protocols and provide comprehensive training to ensure everyone’s wellbeing. Proper safety training can reduce workshop accidents by up to 85%, making it an essential aspect of any woodworking experience. Making the Most of Your Local Carpentry Workshop Finding and working with the right carpentry workshop can make all the difference in achieving your desired results. Research shows that 87% of successful projects start with proper workshop selection and clear communication of expectations. Choosing the Right Workshop Check portfolio and past project examples Verify qualifications and insurance coverage Read customer reviews and testimonials Assess communication style and responsiveness Compare pricing and service packages Building Long-term Relationships Establishing a lasting relationship with a local carpentry workshop can lead to better understanding of your preferences, more efficient project execution, and often preferential pricing for repeat customers. Regular clients typically save 15-20% on subsequent projects through established relationships. Conclusion: Crafting Your Perfect Space A professional carpentry workshop near you is more than just a service provider – it’s a partner in creating the home of your dreams. With their expertise, equipment, and commitment to quality, you can transform any space into a masterpiece of woodworking craftsmanship. Getting Started Research local workshops and review their portfolios Schedule initial consultations with potential partners Prepare a clear vision and budget for your project Ask about available learning opportunities Start with a smaller project to test the working relationship FAQ What is a skilled carpenter called? In others, like the United States, ‘master carpenter’ can be a loosely used term to describe any skilled carpenter. Fully trained carpenters and joiners will often move into related trades such as shop fitting, scaffolding, bench joinery, maintenance and system installation. What are 5 works done by a carpenter? Measure, cut, and shape wood, plastic, and other materials. Construct and install building frameworks, including walls, floors, and doorframes. Inspect and replace damaged framework or other structures and fixtures. Instruct and direct laborers and other construction helpers. Sources [1] https://www.woodcraft.com/pages/woodworking-classes-near-me [2] https://buildstrongacademy.org/colorado/courses/carpentry/ [3] https://www.woodworksstudio.com/woodworking-classes

dovetail joint precision hand cutting

How to Master the Perfect Dovetail Joint: The Ultimate Craftsman’s Guide

From novice mistakes to professional precision, discover the ancient art of the dovetail joint that transforms ordinary woodwork into masterpieces of craftsmanship. Understanding the Dovetail Joint: A Heritage of Craftsmanship The dovetail joint represents one of woodworking’s most enduring and elegant achievements, with a rich history spanning thousands of years. First appearing in ancient Egyptian furniture and Chinese royal tombs, these joints have stood the test of time, quite literally. In modern British woodworking, dovetail joints remain the hallmark of quality craftsmanship, particularly in fine furniture making where strength and aesthetic appeal are paramount. What makes these joints exceptional is their unique combination of mechanical strength and visual appeal. When properly executed, dovetail joints actually become stronger over time, making them ideal for pieces meant to become family heirlooms. The Anatomy of a Perfect Dovetail The Essential Components Understanding the fundamental elements of a dovetail joint is crucial for mastering this technique. The joint consists of two primary components: Pins: The wedge-shaped projections that extend from one board Tails: The flaring sockets cut into the adjoining board that receive the pins Baseline: The critical reference line marking the depth of the joint Shoulder: The flat surface that meets when the joint comes together Pin board: The piece containing the pins Tail board: The piece containing the tails Types of Dovetail Joints Different applications call for specific types of dovetail joints. The most common variations include: Through Dovetails: Visible from both sides, ideal for box corners and visible joinery where strength and beauty are desired Half-blind Dovetails: Visible from one side only, commonly used in drawer fronts Secret Mitered Dovetails: Completely hidden within a mitered corner, used in high-end decorative boxes Sliding Dovetails: Used for joining cabinet sides to shelves or drawer dividers Tools of the Trade Hand Tools for Traditional Methods Achieving the perfect dovetail joint requires a carefully selected set of quality tools. For traditional hand-cutting methods, essential tools include: Dovetail saw (with 15-20 TPI for precise cuts) Sharp chisels (particularly 6mm and 12mm) Marking gauge Marking knife Square and sliding bevel Mallet (preferably hardwood or brass) Modern Power Tools and Jigs While purists might prefer hand tools, modern equipment can produce consistent, high-quality joints efficiently. Key power tools include: Router with dovetail bit Dovetail jig (Leigh or Porter-Cable are popular UK choices) Guide bushings Templates for various joint sizes Step-by-Step Guide to Hand-Cut Dovetails Preparation and Marking Success in cutting dovetails begins with meticulous preparation. Start by ensuring your timber is perfectly square and marked accurately. Use a marking gauge to scribe the baseline on both pieces, typically 3-4mm deeper than the thickness of the adjoining board. When marking out the tails, aim for a slope ratio between 1:6 and 1:8 for hardwoods, and 1:7 to 1:9 for softwoods. These angles provide the optimal balance between strength and aesthetic appeal. Cutting the Joint The cutting process requires patience and precision. Begin with the tails, as they’re easier to transfer to the pin board. Hold your saw at a consistent angle, letting the weight of the saw do the work. Cut precisely to your lines, staying on the waste side. After sawing, remove the waste with sharp chisels, working from both sides to prevent splitting. Remember to undercut slightly for a tighter fit at the visible surface. Fine-Tuning and Fitting The final fit requires careful attention to detail. Test-fit the joint frequently, marking any tight spots with a pencil. Use a sharp chisel to pare away small amounts until the joint slides together with firm hand pressure. A properly fitted dovetail should require no more than gentle persuasion to assemble. Common Mistakes and How to Avoid Them Troubleshooting Guide Even experienced craftsmen encounter challenges with dovetail joints. Here are common issues and their solutions: Gaps at the baseline: Usually caused by inaccurate marking or sawing. Solution: Use a marking gauge with a sharp knife edge Loose fits: Often results from removing too much material. Solution: Start conservative and gradually pare away material Pins breaking during assembly: Typically caused by too-thin pins. Solution: Maintain minimum 3mm thickness for pins Uneven spacing: Results from poor layout. Solution: Use dividers for consistent spacing Advanced Techniques and Applications Decorative Variations Once you’ve mastered basic dovetails, explore decorative variations that can add distinctive character to your work. Consider incorporating contrasting woods, varying pin widths, or adding additional pins for visual interest. The secret mitered dovetail, while challenging, creates an almost invisible joint that appears as a perfect miter from the outside. Material-Specific Considerations Different woods require different approaches. Hardwoods like oak and maple need sharp tools and careful technique to prevent splitting, while softwoods require extra attention to prevent crushing. Cross-grain dovetails present special challenges and should be avoided when possible. Perfecting Your Craft: Practice Projects Simple Box Construction Begin with small projects to build confidence. A simple box with through dovetails at the corners provides excellent practice and immediate feedback on your technique. Start with pine or poplar before moving to more expensive hardwoods. Drawer Construction Masterclass Drawer construction combines multiple dovetail types and requires precise fitting. Focus on creating consistent gaps between pins and ensuring drawer fronts align perfectly with their openings. Maintaining and Caring for Your Joints Proper maintenance ensures your dovetail joints remain strong and beautiful for generations. Keep wooden pieces at consistent humidity levels, clean joints regularly, and repair any damage promptly. When gluing, use quality woodworking adhesive and apply even clamping pressure. Conclusion: From Apprentice to Master Mastering the dovetail joint requires patience, practice, and persistence. Start with simple projects and gradually increase complexity as your skills improve. Remember that even master craftsmen were once beginners, and each joint you cut builds your expertise. With dedication to perfecting this timeless technique, you’ll create woodwork that stands as a testament to true craftsmanship. FAQ What is the weakest joint in woodworking? A butt joint uses a simple technique whereby two pieces of material are joined together at their ends, without any special shaping or cutting. Although it is

leather carpenter apron tools workshop

Why Every Carpenter Needs a Professional Carpenter’s Apron: The Ultimate Guide

Discover why a well-crafted carpenter’s apron isn’t just a tool holder – it’s the secret weapon that transforms good craftsmen into exceptional ones. For professional carpenters and DIY enthusiasts alike, having the right tools within arm’s reach isn’t just convenient – it’s essential for efficiency and craftsmanship. A well-designed carpenter’s apron could be the game-changing addition to your workspace you never knew you needed. Recent studies show that organised workspaces can increase productivity by up to 30%, and a proper carpenter’s apron is at the heart of this efficiency. Understanding the Anatomy of a Professional Carpenter’s Apron A professional carpenter’s apron is more than just a simple garment with pockets. It’s a carefully engineered piece of equipment designed to enhance workflow and protect the wearer. Modern carpenter’s aprons have evolved significantly, with manufacturers incorporating feedback from professional craftsmen to create increasingly sophisticated designs. The best aprons combine durability, functionality, and comfort in a way that makes them indispensable to any serious woodworker. Materials Matter: Canvas vs. Leather Canvas: Typically 12-16oz duck canvas, offering excellent durability while remaining lightweight. Popular in the UK due to our variable weather conditions. Leather: Usually full-grain or top-grain leather, providing superior durability and developing a unique patina over time. Hybrid Materials: Modern aprons often combine materials, such as canvas bodies with leather reinforcements in high-wear areas. Water-resistant Treatments: Many UK-specific models feature water-resistant coatings to handle our damp climate. Essential Features: Pockets, Loops, and Reinforcements The functionality of a carpenter’s apron lies in its thoughtful design features. Studies show that properly organised tools can save up to 30 minutes per day in workplace efficiency. Modern aprons typically include: double-stitched pockets for durability, reinforced corners to prevent wear, dedicated spaces for specific tools, and strategic placement of pockets to maintain balance while worn. The Importance of Proper Fit and Adjustability Adjustable neck and waist straps for customised fit Cross-back straps to distribute weight evenly Quick-release buckles for safety and convenience Size options ranging from S to XXL to accommodate all body types Benefits Beyond Tool Storage While tool organisation is crucial, professional carpenter’s aprons offer numerous additional advantages that contribute to both efficiency and safety on the job. Recent workplace safety studies indicate that proper protective wear can reduce minor injuries by up to 25%, making a quality apron an investment in both productivity and personal protection. Protection and Safety Considerations Modern carpenter’s aprons serve as a crucial barrier between sharp tools, sawdust, and your clothing. They protect against common workshop hazards while keeping essential safety gear within easy reach. The best aprons feature reinforced panels in high-impact areas and flame-resistant treatments for additional protection. Workflow Efficiency and Organization Reduced time searching for tools Improved project completion times Better organisation of small parts and fasteners Enhanced mobility around the workshop Professional Image and Durability A well-maintained carpenter’s apron projects professionalism and attention to detail. UK craftsmen report that clients are 40% more likely to recommend services when tradespeople present a professional appearance, including proper workwear. Choosing the Right Carpenter’s Apron Selecting the perfect carpenter’s apron requires careful consideration of several factors. The UK market offers numerous options, from traditional leather designs to modern synthetic alternatives. Investment in a quality apron can provide 3-5 years of daily use, making it crucial to choose wisely. Size and Comfort Considerations Measure chest and waist accurately Consider the weight distribution when fully loaded Test adjustability features Ensure proper length for your height Quality Indicators and Brand Recommendations Look for reinforced stitching, quality materials, and positive reviews from professional carpenters. Popular UK brands like Dickies and DeWalt offer excellent options, while boutique manufacturers like British-made Heritage Leather provide premium alternatives. Investment Value and Longevity Quality carpenter’s aprons typically range from £30 to £150, with premium leather options commanding higher prices. Consider this an investment that typically pays for itself within the first few months through improved efficiency and tool protection. Maintaining Your Carpenter’s Apron Proper maintenance extends the life of your carpenter’s apron and maintains its functionality. Regular care ensures your investment continues to serve you well for years to come. Cleaning and Storage Tips Weekly cleaning with appropriate materials Proper drying techniques to prevent mould Storage in a dry, ventilated area Regular inspection for wear and tear Repairs and Replacements Address minor repairs promptly to prevent larger issues. Many UK manufacturers offer repair services or replacement parts, making it worthwhile to invest in brands with good customer support. Making the Most of Your Carpenter’s Apron Maximise the benefits of your carpenter’s apron through thoughtful organisation and customisation. Efficient tool arrangement can reduce movement by up to 50% during common tasks. Tool Organization Strategies Arrange tools by frequency of use Keep heavy items close to your body’s centre of gravity Group similar tools together Maintain consistent placement for muscle memory Customization Tips Consider adding personal modifications like extra loops, magnetic strips, or custom pockets to suit your specific needs. Many UK carpenters successfully personalise their aprons to match their unique working styles. Conclusion: Elevating Your Carpentry Game A professional carpenter’s apron is more than just a tool storage solution – it’s a crucial component of efficient, safe, and professional woodworking. By investing in a quality apron and maintaining it properly, you’ll enhance your workflow, protect your tools, and present a more professional image to clients. Whether you’re a seasoned professional or just starting your carpentry journey, the right apron will prove invaluable to your success in the trade. Sources [1] https://hudsondurablegoods.com/products/hdg901w-heavy-duty-16-oz-waxed-canvas-work-apron-woodworker-edition [2] https://www.grizzly.com/products/grizzly-carpenter-s-bib-apron/h2922 [3] https://www.youtube.com/watch?v=MW5Be1zlSoM

rugged carpenter pants work pocket

Are Carpenter Pants Really Worth The Investment? The Ultimate Workwear Guide

Discover why professional carpenters swear by these rugged, multi-pocketed carpenter pants and whether they’re the game-changing workwear you’ve been missing. Understanding Carpenter Pants: More Than Just Work Trousers When it comes to professional carpentry, having the right workwear isn’t just about comfort – it’s about efficiency, safety, and productivity. Carpenter pants have evolved from simple work trousers into sophisticated workwear that combines durability with functionality. These specialised trousers, featuring distinct characteristics like reinforced stitching and multiple tool-specific pockets, have become an essential part of a carpenter’s arsenal. Recent studies show that properly designed workwear can increase productivity by up to 25%, making the choice of appropriate work clothing more crucial than ever. What sets carpenter pants apart is their thoughtful design that addresses the unique challenges faced by woodworking professionals. Unlike standard work trousers, carpenter pants are engineered with specific features that cater to the demands of carpentry work, from dedicated loops for hammers to reinforced knee panels that can accommodate protective inserts. The Key Features That Make Carpenter Pants Stand Out Durability and Construction The foundation of quality carpenter pants lies in their robust construction. Modern carpenter pants utilise advanced materials and construction techniques that ensure longevity and reliability. Key durability features include: Triple-stitched main seams that provide up to 3 times more durability than standard stitching Ripstop fabric technology that prevents tears from spreading Reinforced knee panels with space for protective inserts Heavy-duty zippers and buttons designed for frequent use Bar-tack stitching at stress points to prevent seam failure Functional Design Elements The true value of carpenter pants lies in their thoughtful design elements that enhance functionality and convenience. Each feature serves a specific purpose, making these trousers a comprehensive tool management system. Essential design elements include: Multiple tool-specific pockets positioned for easy access Dedicated hammer loop positioned for optimal balance Reinforced tool loops that can hold various equipment Large cargo pockets for storing bigger items Quick-access phone pocket with protective lining Comfort and Mobility Despite their rugged construction, modern carpenter pants prioritise comfort and flexibility. The latest designs incorporate ergonomic features that allow for unrestricted movement while maintaining durability. Key comfort features include gusseted crotch panels, articulated knees, and breathable materials that help regulate temperature throughout the workday. Studies show that comfortable workwear can reduce fatigue by up to 30%, leading to increased productivity and job satisfaction. Real Value Analysis: Cost vs. Benefits Initial Investment Considerations Quality carpenter pants typically range from £40 to £100, with premium brands commanding higher prices. While this might seem steep compared to regular work trousers, the investment often pays dividends in durability and functionality. Consider these price points from leading brands: Entry-level carpenter pants: £40-£55 Mid-range options: £55-£75 Premium selections: £75-£100+ Long-term Durability Benefits The superior construction of carpenter pants translates to exceptional longevity. Research indicates that quality carpenter pants last 2-3 times longer than standard work trousers, making them more cost-effective in the long run. When properly maintained, a good pair can easily last 18-24 months of regular use, compared to 6-8 months for standard work trousers. Productivity Improvements The strategic design of carpenter pants contributes significantly to workplace efficiency. Features like easily accessible tool pockets and dedicated loops eliminate the need for constant trips to the toolbox, potentially saving up to 30 minutes per workday. This time savings alone can justify the investment in quality workwear. Choosing the Right Carpenter Pants Material Selection The choice of material significantly impacts durability, comfort, and functionality. Here are the most common options: Cotton Duck Canvas (12-14 oz): Extremely durable, ideal for rough conditions Cotton-Polyester Blend: Offers balance of durability and comfort Ripstop Cotton: Enhanced tear resistance Stretch Materials: Better mobility for dynamic work Fit and Style Options Finding the right fit is crucial for both comfort and functionality. Modern carpenter pants come in various fits to suit different body types and work environments: Relaxed Fit: Most popular, offers maximum mobility Straight Leg: Better for climbing ladders and scaffolding Slim Fit: Modern option for less demanding work Athletic Fit: Tailored through thigh with room for movement Brand Comparison Leading manufacturers offer distinct advantages worth considering. Here’s a quick overview of top brands in the UK market: Carhartt: Known for exceptional durability and traditional styling Dickies: Offers excellent value for money and consistent quality Snickers Workwear: Premium features and innovative materials DeWalt: Robust construction with practical design elements Making the Investment Decision When evaluating whether carpenter pants are worth the investment, consider your specific needs and working conditions. For professional carpenters who rely on their tools daily, high-quality carpenter pants are undoubtedly worth the investment. The combination of durability, functionality, and comfort translates to improved efficiency and reduced long-term costs. For occasional DIY enthusiasts, mid-range options might provide the best balance of features and value. Remember, investing in quality workwear is an investment in your productivity, comfort, and safety. When choosing your carpenter pants, prioritise features that match your specific work requirements and ensure proper fit for maximum benefit. FAQ Why are men’s pants pockets sewn shut? If you’ve ever bought a new suit or dress slacks, you’ve noticed some pockets are sewn shut. The reason for this is purely aesthetic. Manufacturers want suits to retain their tailored look, but as people try the clothes on they can alter the fabric’s shape. This is especially true with the pockets. What is the tiny pocket in pants for? Nowadays, it has no actual use, but back then, in 1873, to be precise, the jeans inventor Levi Strauss solved a particular problem with this tiny pocket: to safely keep the pocket watch. What is the button inside trousers for? The Purpose of Internal Buttons To put it simply, they help distribute the tension at the center front of trousers more evenly. The internal buttons help relieve some of the tension typically carried by the central zipper and/or button(s). What are the side pockets on carpenter pants for? Carpenter pants are designed with multiple pockets to accommodate the storage needs of workers. Some of the most

professional carpentry tool workshop setup

What Makes the Perfect Carpentry Tool? Expert Guide to Choosing Your Essential Workshop Companion

Unlock the secrets of selecting the ideal carpentry tool that transforms novice woodworkers into master craftsmen – your journey to woodworking excellence starts here. Understanding Tool Quality and Investment In the world of carpentry, the adage ‘buy cheap, buy twice’ couldn’t be more accurate. Recent studies show that professional carpenters who invest in high-quality tools save an average of £2,500 over five years compared to those who repeatedly purchase lower-quality alternatives. Quality tools not only perform better but also provide enhanced safety features and reliability. The initial investment might seem steep, but premium tools often come with extended warranties, superior materials like high-carbon steel, and ergonomic designs that prevent fatigue during long working hours. Essential Hand Tools for Every Carpenter Every craftsman’s journey begins with a foundation of reliable hand tools. These timeless implements form the backbone of carpentry work, with recent surveys indicating that 92% of professional carpenters still rely heavily on manual tools despite technological advances. The key is selecting tools that offer precision, durability, and comfort during use. Modern innovations in metallurgy and ergonomics have revolutionised even the most basic hand tools, making them more efficient and user-friendly than ever before. Measuring and Marking Tools Tape Measure: Opt for models with at least 25ft length and nylon coating Carpenter’s Pencil: Choose flat-sided designs for better grip and control Chalk Line: Look for rust-resistant cases and high-visibility chalk Speed Square: Select aluminium or steel construction for longevity Sliding Bevel: Ensure smooth locking mechanism and accurate angle retention Cutting and Shaping Tools The precision of your cutting tools directly impacts the quality of your work. Modern utility knives now feature quick-blade-change mechanisms and safety locks, while premium wood chisels are crafted from high-carbon steel that maintains its edge up to 40% longer than standard versions. Tin snips with compound action can reduce hand fatigue by up to 30%, making them essential for long working sessions. Power Tools That Transform Your Capabilities The evolution of power tools has revolutionised modern carpentry, with recent technological advances increasing efficiency by up to 65%. Investing in quality power tools can dramatically reduce project completion times and improve precision. The latest market research shows that cordless tools now account for 70% of new power tool purchases, highlighting the industry’s shift towards greater mobility and convenience. Basic Power Tools Cordless Drill: 18V minimum, brushless motor, with hammer function Circular Saw: Look for models with laser guides and electric brakes Reciprocating Saw: Variable speed control and tool-less blade change Impact Driver: Essential for driving large screws and bolts Advanced Power Equipment Professional-grade power tools represent a significant investment but offer unparalleled capabilities. Modern routers now feature digital depth adjustment accurate to within 0.1mm, while planers and jointers with helical cutting heads produce surfaces that require 50% less sanding. The latest table saws include flesh-sensing technology that has reduced accidents by 99% since their introduction. Maintenance and Care Regular maintenance can extend tool life by up to 300% while ensuring optimal performance. Establish a routine cleaning schedule, regularly inspect power cords and moving parts, and maintain proper lubrication. Studies show that tools maintained weekly perform 40% better than those serviced sporadically. Keep detailed maintenance records and store tools in a dry environment with humidity control to prevent rust and degradation. Building Your Tool Collection Start with essential hand tools and gradually expand Invest in quality versions of frequently used tools first Consider buying tool sets for better value Research warranty terms and after-sales support Look for tools with universal accessories and attachments Priority should be given to safety equipment and measuring tools Making the Right Choice: A Professional’s Perspective Professional carpenters emphasize that tool selection should align with project requirements and skill level. Market research indicates that 85% of professionals prefer tools from established manufacturers due to reliability and available support. Consider factors like weight, balance, and ergonomics, as these significantly impact work quality and user comfort during extended use. Quality Indicators Solid construction with minimal plastic components Precise machining and smooth operation Comprehensive warranty coverage Positive professional reviews and recommendations Available spare parts and service support Investment Strategy Develop a strategic approach to tool investment based on your specific needs and budget. Industry experts recommend allocating 15-20% of project revenue towards tool acquisition and maintenance. Premium tools often retain up to 60% of their value after five years, making them a sound investment for serious craftsmen. Conclusion: Crafting Your Perfect Tool Arsenal Building the perfect carpentry tool collection is a journey that evolves with your skills and projects. Focus on quality over quantity, prioritize safety and precision, and invest in tools that will grow with your expertise. Remember that the best tool is one that feels natural in your hands and delivers consistent results. By following these guidelines and maintaining your tools properly, you’ll create a workshop arsenal that serves you reliably for years to come. FAQ What is a wood-turning tool called? Wood lathe turning tools are easily identifiable by their shape and blade. The list below shows how to identify wood-turning tools: Gouges are round and cylindrical-shaped tools, while chisels, parting tools, and scrapers are flat bar-shaped tools. Gouges are distinguishable based on the size of their flute. What is a carpenter’s toolbox? A sliding tray at the top of the box has compartments for nails and fasteners. The underside of the lid is fitted with a holder for a hand saw. And a leather handle on top of the lid makes it easier to carry the toolbox around from job to job. Which tool is also known as a carpenter’s or rafter square? A speed square, also called a rafter square, rafter angle square, and triangle square, is a multi-purpose triangular carpenters’ tool used for marking out. Its functions encompass many of those offered by combination squares, try squares, and framing squares. What is a carpenter’s shaping tool called? wood shaping tool: crossword clues. Matching Answer. ADZE. What are the boring tools in carpentry? A hole may be drilled or bored; awls,

detailed carpentry schematic drawing blueprint

How to Master Schematic Drawing: The Complete Carpenter’s Guide to Technical Design

Transform your carpentry projects from concept to reality with expert schematic drawing techniques that bring precision and professionalism to every design. Understanding Schematic Drawing in Modern Carpentry In today’s digital age, schematic drawing has become an indispensable skill for professional carpenters. Recent studies show that over 85% of successful carpentry projects begin with detailed technical drawings. These drawings serve as the foundation for clear communication between carpenters, clients, and other trades professionals. The evolution of carpentry from traditional hand-sketching to precise technical drawings reflects the industry’s growing demand for accuracy and efficiency. Modern carpenters who master schematic drawing can reduce errors by up to 40% and save considerable time during project execution. The Fundamentals of Carpentry Schematics Technical Drawings Defined: Precise, scaled representations of carpentry projects that showcase dimensions, materials, and construction methods Basic Principles: Adherence to standard drawing conventions, proper use of lines and symbols, and accurate scale representation Essential Tools: Professional drawing boards, T-squares, scale rulers, and digital drawing tablets Measurement Standards: Understanding metric and imperial measurements, conversion techniques, and scale ratios commonly used in UK construction Key Components of Carpentry Schematics The backbone of any carpentry schematic lies in its essential components. Floor plans and elevations form the primary views, providing a comprehensive understanding of the project’s spatial relationships. Joint details and connections must be meticulously detailed, as research indicates that 60% of carpentry failures stem from poor joint execution. Material specifications need to include precise dimensions, grades, and finishes, while dimensional annotations must follow British Standards (BS 1192) for construction drawing practices. Advanced Techniques for Professional Drawings Mastering advanced schematic techniques sets professional carpenters apart in today’s competitive market. Creating detailed cross-sections requires understanding complex geometries and material interactions. When representing joinery, precision is paramount – industry data shows that projects with detailed joinery drawings are 75% more likely to meet client expectations. Material notations must comply with current British building regulations, and incorporating industry standards ensures drawings are universally understood across the construction sector. Digital Tools and Modern Approaches CAD Software: AutoCAD, SketchUp Pro, and Vectorworks are leading choices for UK carpenters 3D Modeling: Essential skills in Fusion 360 and Rhino for complex project visualization Digital Measurement: Laser measures, digital angle finders, and mobile apps for on-site verification Cloud Solutions: BIM 360 and Procore for real-time collaboration and document control Common Mistakes and How to Avoid Them Understanding common pitfalls in schematic drawing can save countless hours and resources. Scale errors typically occur when converting between measurement systems – a recent survey showed that 30% of drawing errors relate to scale inconsistencies. Detail oversight often happens during complex joinery representation, while communication clarity suffers from insufficient notation. Implementing robust version control systems has been shown to reduce revision-related errors by 65% in professional carpentry practices. Practical Application in Real Projects Design Development: Progress from initial concept sketches through to detailed technical drawings Presentation Methods: Professional techniques for showcasing designs to clients using both physical and digital media Integration Strategy: Incorporating drawings into comprehensive project management systems Cost Analysis: Using schematics to generate accurate material lists and labour estimates Taking Your Skills to the Next Level Professional development in schematic drawing is crucial for career advancement in carpentry. The UK offers various certification paths through institutions like City & Guilds and the Institute of Carpenters. Statistics show that certified carpenters with advanced drawing skills earn 25% more than their non-certified counterparts. Continuing education through workshops, online courses, and industry seminars keeps skills current with evolving technologies and standards. Building a strong portfolio of technical drawings can lead to higher-value projects and increased client trust. Conclusion: Building Your Technical Design Future Mastering schematic drawing is no longer optional in modern carpentry – it’s a fundamental requirement for success. By implementing these techniques and continuously developing your skills, you’ll position yourself at the forefront of the industry. Remember, projects with comprehensive technical drawings are 90% more likely to be completed on time and within budget. Whether you’re working on residential renovations or commercial installations, your ability to create precise, professional schematics will be the foundation of your carpentry career’s success. FAQ Are blueprints and schematics the same thing? Blueprints may be in the form of schematics or diagrams. A schematic represents the elements of a system through abstract, graphic symbols. A diagram, on the other hand, does so using more realistic pictures. Due to subtle differences, some are referred to as schematic diagrams. What does a schematic drawing look like? In a schematic diagram, lines are used to represent wires, and symbols are used to represent components. The schematic diagram does not show the practical connection between the components or their position. It contains only symbols and lines. What are scheme drawings? Detailed schematics of the installation are made on the drawing type schematic. On opening the schematic drawing, the Schematic menu activates and displays the specific commands to create schematics. Sources [1] https://www.protoexpress.com/blog/whats-the-meaning-of-schematic-diagram/ [2] https://www.analog.com/en/resources/analog-dialogue/studentzone/studentzone-february-2017.html [3] https://en.wikipedia.org/wiki/Schematic